Wednesday, October 14, 2015

Khotto Ani Mudo ;Festival Special; Navratri day 3.


Khotto & Mudo are two very traditional Mangalorean Konkani dishes that are prepared on auspicious/special events be it religious festivals or weddings, engagement parties and even during death anniversaries. Khotto is basically idlis ( rice-lentil cakes) that are made in moulds/cups made out of jackfruit leaves while Mudo is idli made in a cylindrical mould made out of some leaves that grow in the wild. It is believed that these are basically leaves of a plant that bears these flowers called "Bingaru".


Mudo is usually available during rainy season or the festival season in South Canara region. I cannot speak about elsewhere. If you are aware of other places that use these, please do share with us. Khotto, however is available all through the year as jackfruit leaves are available all year round. Most people have jackfruit trees in their backyards or somewhere close to them, so it is easily accessible to them. The problem however is that not everyone knows how to put the four jackfruit leaves together to make the Khotto cup/mould. I recently was in India on vacation and had a chance to videotape my mother making Khotto out of the leaves. I am going to share that video with you as soon as I have had a chance to edit it.
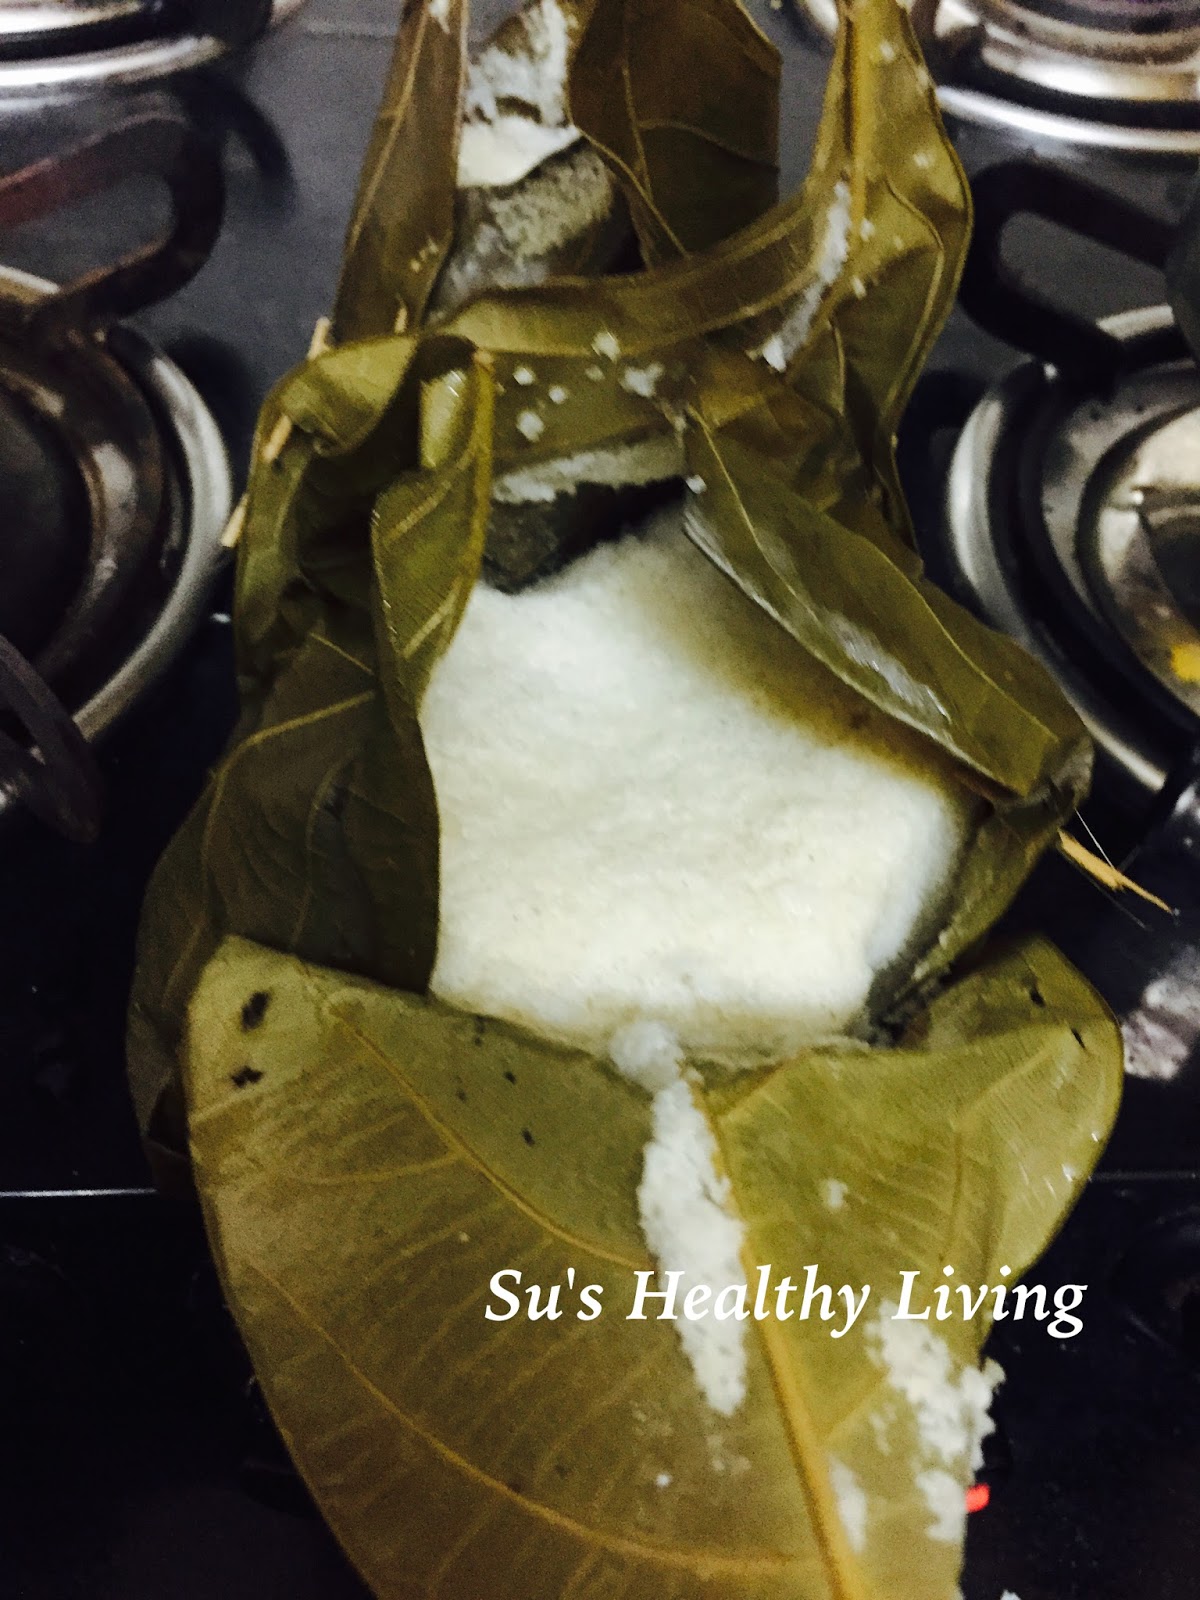


The batter used in both Khotto and Mudo is the basic idli batter except that during festivals, the rice in the idli batter is replaced with sooji or  varai / samo. You can find the recipe for the same here. Just replace the rice with samo. The difference however is in flavor in each of these due to the leaves that are used. Each one imparts a distinctive flavor and smell to the idli which can only be understood by someone who has eaten them. It is truly a specialty. When I went home this time, I refused to eat mere idlis. I ate all the mudos and khottos that I could. Khottos and mudos take longer to cook due to the volume and density of each one of them depending on the size. Mudos take even longer than khottos to cook.


Servings: 6


Ingredients:


For the mould ( Khotto):
Jackfruit leaves: 24 medium leaves
Thin wooden skewers: 50 in number

For the mould ( Mudo): get readymade ones.

For the batter:
Urad dal: 1/2 cup
Cream of wheat( sooji):  1 cup
Water: 1 to 1 1/2 cups to grind urad dal
Salt to taste ( approximately 3/4 tsp)

Method:

For the mould ( Khotto): See the pictorial below:


For the batter:

Soak Urad dal for at least 3-4 hours.

Wash sooji/cream of wheat  thoroughly . Take it in a heat-proof bowl. Boil 5 cups water in the idli steamer/ pressure cooker, with the steamer plate in it. Place the bowl with the cream of wheat in it . Close the steamer/ pressure cooker and cook it for 10 mins on medium flame. Turn off the flame. Take the bowl out and let it cool down to room temperature.

Blend urad dal in a blender/ grinder , adding water little at a time until it rises to 3 times the volume you started with. Make sure you give the motor of the blender some rest in between. The consistency of the ground urad dal should be fluffy  and light ,not runny.

Pour the blended urad dal in a big bowl/ container.

Now mix the steamed and cooled sooji ( cream of wheat) with the  urad dal , cover and let it sit overnight to ferment. If living in cold region, you can keep it in the cold oven/ microwave overnight.

Next  morning add  salt to the batter and mix well.

Ensure that the batter has fermented well. You can know this when the batter has risen a little in the container. The consistency of the batter should be slightly thicker than the usual idli batter.

Putting it together :

Boil 500 ml of water in the idli steamer or pressure cooker with the steamer plate in.Fill the khotto/ mudo with batter until 2/3 full and steam in the idli steamer / pressure cooker ( without using the weight) on medium- high flame for 30 minutes or until a skewer comes out clean when inserted. Mudo may need another extra 10-15 minutes before they are done. Turn off the heat and let it cool down in the steamer for another 10 minutes before taking them out of the mold.


Once completely cooled, you should be able to gently shake the mould and bring the steamed Khotto out in its entirety without breaking it and re-use the mould for another round of steaming. However, if you are apprehensive of breaking the Khotto, you can peel the mould and remove the Khotto out. In this case, you will no longer be able to re-use the mould.


Serve the khotto/mudo hot with sambar/ chutney or both.


Cooking made easy:


Usually for auspicious occasions, rice is not used for making Khotto/ Mudo. Instead sooji or varai ( samo) is used. For daily purposes, you could use idli rava ( rice rava) or soak and grind rice to make batter, as explained here.

Tip for healthy living:


Idli/ Khotto when served with coriander chutney or Sambhar becomes a complete meal with the essential portions of protein ( urad dal and tur dal), sooji/ rice rava( carbohydrates) and the vegetables in the Sambhar  or the greens in chutney providing essential minerals and vitamins.

Food for thought:


What you do today can improve all your tomorrows. Ralph Marston

Spicy Fall Salad; Day 2, Navratri Special.


We often think that salads are for summer and avoid making/ having them during fall/winter. The truth is that salads can be made and had during any season. It is the ingredients in the salad that change with the season. Summer means more cooling salads with a variety of seasonal summer fruits while fall/winter calls for salads with root vegetables, squashes, beans and corn. Today I am sharing with you one such salad that is protein-packed and filling. This is a salad that could be had for any season. Here, even though it is fall, afternoons are still warm( make it hot), while mornings are chilly. Coming back to the salad, this salad has been spiced with some peppers. The spiced part is of course optional. Not everyone can handle the chillies. Spiced or not, this salad is absolutely delicious! It is super-easy to make and enjoyable by most people. Can be eaten whether you are fasting or not..


Servings: 4-6 ( serving size: 2 cups per person)


Ingredients:


Cooked Chickpeas: 2 cups
Tender green peas: 2 cups
Corn kernels: 2 cups
Broccoli florets: 1 cup
Celery: 1 stalk, chopped
Avocado: 1 medium size, chopped into medium pieces.
Spicy red pepper: 1, small, deseeded and chopped ( any kind can be used). ( OPTIONAL)
Dill leaves, chopped: 1 tbsp
Lemon juice: 2 tbsp
Lime juice: 2 tbsp
Salt: to taste
Black pepper: a pinch ( optional)

Method:


Blanch the broccoli , green peas and corn in hot water. Drain it completely and keep aside .

Take all the other ingredients to the salad bowl. Add in the blanched and cooled  broccoli, corn and green peas.

Mix well.  Garnish with a few sprigs of dill. Serve chilled.

I am bringing these goodies to Throwback Thursday #10, Fiesta Friday # 90 and Saucy Saturday. At the Fiesta,Effie @ Food Daydreaming and Lindy @ Lindy Mechefske are co-hosting this weekend.


Cooking made easy:


Each time I make a salad, I say this: use what is available. It is a salad. You can add anything  that you have on hand. You can add nuts, cheese cubes, feta or cottage cheese.. Pretty much anything as long as they go with each other.

For the easy way out, you can use canned chickpeas, green peas and corn. Of course, I don't recommend canned stuff. But, in a pinch it is okay.

Tip for healthy living:


While canned vegetables and beans is a easy way out, it is not the most healthy way to eat vegetables and beans. Remember, for something to have a long life, it has to be preserved somehow.Sodium is often used to enhance flavor and the increased amounts of sodium in canned items can take a significant toll on the human blood pressure and  increase the risk of heart disease. The BPA present in the inside lining of the can may also be a concern as it leeches into the fluid present in the can.

Food for thought:


Inhale the future without any expectation. Hold the present and exhale the past without regret.
Unknown


Tuesday, October 13, 2015

Quick Masala Eggplant


Navratri is a nine-day long festival that is celebrated in India with much pomp. Navratri  literally means Nine- nights." Nav" means nine and "ratri" means night. This is a festival that is celebrated for 9 days and 10 days . This festival is celebrates the Hindu Goddess (Devi) in her varied forms. You can read more here.During these days there is lot of festivities, fasting and prayers. You can read more in detail here. Different parts of India celebrate it differently with varied levels of fasting. It is believed in the Hindu religion that fasting is a form of cleansing and also that of self-discipline. The levels of fasting vary from complete fasting wherein the individual does not eat or drink all day and consumes a satvik vegetarian meal to an individual who only observes a vegetarian diet for nine days. Some only eat fruits and drink milk all nine days.Fasting is completely voluntary. It is perfectly ok if one chooses not to observe any of this and continues to eat a non-vegetarian meal.  Now, what is a satvik meal? A satvik meal is one that is without meat, eggs, fish, rice, onion and garlic . Are you surprised?? Well, you will be even more surprised when I tell you that all our weddings and other auspicious occasions have meals that are satvik , except that rice is served. And it is truly delicious. Coming back to the fasting: the North Indians follow a different kind of fasting while the South Indians follow a different kind of fasting. You can check the North Indian style of fasting for Navratri here. I am a South Indian and therefore I am familiar with only how fasting is observed  in the Southern Indian state of Karnataka. The other South Indian states like Tamilnadu and Kerala have a different way of fasting. You can check how the different states celebrate this festival here. I have only discussed the fasting part of this festival as this is a food-related blog.

Now,as for me personally, I used to not observe fasting during my younger days. Now for around 18 years I have been observing fasting during Navratri. This is how I do it. I take a bath first thing in the morning. Then I light a lamp in front of the altar. I then  eat breakfast in the morning which is usually a satvik meal with one cup of coffee. I do not eat anything all through the day. In the evening I eat another Satvik meal. That's it. Nothing in between or later. This for me is a great way to cleanse myself and to exercise my self-determination. It is also a great way to control your senses.

Happy fasting and praying to all those who celebrate Navratri. May you and your family be blessed.

On the occasion of Navratri I will be bringing to you one satvik recipe each day. Today I bring to you this dish which I prepared on a whim..


Sometimes you crave for certain flavors, certain tastes.. Sometimes you want to rustle up something different from the mundane... Sometimes, you want something really quick and easy... Sometimes, you want something that you can just leave on the stove and will transform to a delectable dish. This eggplant dish can meet all the above criteria. Honestly, I didn't know what to name this dish!! This is something that I came up with and created on a whim. I didn't follow any specific recipe and yet, here is a dish that you will want to make over and over again. It is finger-licking delicious! The addition of peanuts is completely optional, but I must say that the peanuts give the dish a nice texture and crunch that makes the dish even more delightful. Therefore, avoid adding peanuts only if you or a family member is allergic to it.


Servings: 3-4 ( serving size: 1/2 cup)

Ingredients:


Eggplant: 1 medium-sized, diced large.
Coconut oil: 1 tbsp
Mustard seeds: 1/2 tsp
Curry leaves: 1 sprig
Roasted Peanut halves: 2 tbsp
Sambhar powder: 1 tbsp ( I used MDH brand sambar powder, any brand can be used).
Tamarind pulp: 1/4 tsp
Salt: to taste

Method:


Dice the eggplant into medium pieces and keep aside.

Heat oil in a frying pan or a sauté pan. Add mustard seeds. Once they splutter, add the chopped eggplant & salt. Reduce the flame, cover and cook until the eggplant reaches the desired level of tenderness. 


Add the Sambhar powder and sauté for 30 seconds. 


Add the tamarind pulp and peanut halves and mix well. Turn off the flame.


Serve hot with rice, roti, bread.

Enjoy. I am bringing these goodies to Throwback Thursday #10, Fiesta Friday # 90 and Saucy Saturday. At the Fiesta,Effie @ Food Daydreaming and Lindy @ Lindy Mechefske are co-hosting this weekend.

Cooking made easy:


If you are out of Sambhar powder or don't have Sambhar powder, you can use any spice mix that you have on hand like rasam powder, curry powder.The taste will be slightly different than what you would get when you use Sambhar powder, but the dish will still be delicious as every spice mix is usually geared to making a flavorful dish.

Tip for healthy living:


For vegetarians,surreptitiously adding nuts, lentils and beans into dishes made with vegetables  is a great way to add protein into your diet.

Food for thought:


A champion is a dreamer that refused to give up. Unknown

Monday, October 12, 2015

Coco-Choco-Nut Bars ;Meatless Monday


Bars with nuts


Bars without nuts


Often we see recipes on the back of food packages like that on the back of sugar package, flour package , inside of the butter carton and completely disregard it! Well, I too am guilty of that!! I usually like to try out recipes that have been made and tested by people and then the recipes have been shared. But this time I decided to be adventurous and do something that I have never done before( well, except for the chocolate chip cookies)! I tried a recipe that was on the back of a package! Of course, me being me, I had to modify the recipe and adapt it to my needs. I used whole wheat flour instead of all purpose flour( maida). I reduced the amount of sugar than what was listed as I thought that the suggested amount was an awful lot and also because I don't like my desserts too sweet. I added nuts to half of the pan and kept the other half nut-free as my son has nut allergies. I sprinkled the nuts on top instead of mixing it in. This way I could clearly demarcate the portion with nuts and the portion without nuts. I  have to say that I am glad I tried it! I liked both the portion with the nuts and the one without. It has a nice slightly crunchy exterior and a soft cakey interior. This recipe is definitely a keeper! And to think that I have been getting brown sugar for God knows how many years now!! Here is the easy and delicious recipe.


Bars with nuts


Servings : makes 24 medium-sized bars


Ingredients:


Coconut oil: 1 cup ( any cooking oil can be used.
Brown sugar: 2 cups + 1/2 tbsp
Eggs: 3, large
Whole wheat flour: 2 cups+ 1 tsp
Baking powder: 2  1/2 tsp
Vanilla essence: 1 tsp
Chocolate chips : 1 cup ( I used Nestle morsels)
Dried shredded coconut: 1 cup
Chopped pecans: 1/2 cup ( optional)
Salt: 1/2 tsp


Method:


Preheat the oven to 375 F.

Grease a 13"x 9"x 2" baking pan and keep aside.

Sift together 2 cups flour, baking powder and salt and keep aside.

Mix together the chopped pecans, 1/2 tbsp brown sugar and 1 tsp flour in a cup and keep aside.

Cream together oil and 2 cups sugar. Add eggs one at a time beating well after each egg. Add the vanilla essence.


Add the sifted flour mixture to the above mixture little at a time, mixing it well in between, until all the flour has been used.


Stir in the chocolate chips.


Pour this into the greased tray.


Sprinkle the pecans/brown sugar mixture on top of the batter in half of the tray.( optional)

Place the tray on the middle rack of the oven and bake for 25-35 minutes or until a toothpick comes out clean when inserted in the middle. Mine was done in exactly 30 minutes!


When done , take the baking pan out and let it cool down completely ( atleast 1-2 hours) before cutting it into pieces. Mine don't look that pretty as I never do a great job cutting! But it tastes absolutely great!

Couldn't resist a bite before taking a picture!


Do try it and leave me a feedback. I am bringing these goodies to Throwback Thursday #10, Fiesta Friday # 90 and Saucy Saturday. At the Fiesta,Effie @ Food Daydreaming and Lindy @ Lindy Mechefske are co-hosting this weekend.


Bars with nuts

Bars without nuts


Cooking made easy:


Make sure that the baking pan is thoroughly greased otherwise the bars will stick to the bottom of the pan and not come out clean.

All purpose flour or maida can be used for this cake. That however would be a less healthy option.

Tip for healthy living:


Use whole grain flours like whole wheat, oat or multigrain flours whenever possible. These are much more nutrient-dense with much needed dietary fiber and vitamins and minerals.

Food for thought:


I have friends in overalls whose friendship I would not swap of the favor of the kings of the world. Thomas A. Edison

Friday, October 9, 2015

Cauliflower Leaves /Stem Pakora ( fritters)


Are you wondering what cauliflower leaves look like?? Or may be where do we get cauliflower leaves from?? Where are they available??
Well, you don't have too far to look..
Remember, every time you bring home a head of cauliflower to cook, there are those green things that they sit on.. Those are cauliflower leaves. Yes, the very same ones that we remove and discard without any further thought. This recipe that I am bringing to you today is one that I learnt from my mother. My mother does not waste anything! Absolutely nothing! No sir. And that is what she has inculcated in us too.. I hope I can inculcate that in my children too.. The world would definitely a better place if we didn't waste so much! Again coming back to my mother... We are Konkanis which means that we belong to a community where we don't waste any part of any kind of produce as long as it is edible . We will find some way to use it.


This pakora is super simple to make and super delicious. It is pan-fried with just a little bit of oil. You can of course deep fry it if you wish. I never have. It comes out very nice when pan-fried. For an even healthier option, you can fry it in an appe pan. That comes out well too..


Servings: makes around 6-8 medium sized pakoras


Ingredients:


Leaves from one medium cauliflower head: roughly around 1 cup, chopped.
Rice flour: 1/4 cup( may not need all).
Onion: 1 small, chopped ( optional)
Chickpea flour( besan): 1 tbsp
Red chilli powder: 1/2 tsp
Asofoetida: a pinch
Salt: 1/4 tsp
Oil: 2 tbsp for frying

Method:


Wash the cauliflower leaves and tender part of the stems thoroughly. Finely chop it. Add it to a bowl.


To this add chopped onion (if you wish), chick pea flour, chili powder, salt, Asofoetida and  just enough rice flour to bind the mixture together into a ball.


Do NOT add water while mixing. After mixing well, using wet hands, pinch a lemon-sized part of the mixture and shape it into a pattie.


Place it on a plate. Make such patties with all the rest of the mixture.

Heat 2 tbsp oil in a frying pan/skillet on medium heat. Add the patties to the skillet and cook on low-medium flame until it begins to turn golden brown, around 4-5 mins.


Flip them all and cook on the other side for another 3-4 mins.  It should be slightly on the crisp side.


Serve hot with rice and dal/rasam or eat it just like that with coriander/mint chutney.

Enjoy. I am bringing this to Throwback Thursday, Fiesta Friday # 89 and Saucy Saturdays.

Cooking made easy:


You can make this pakora with most leafy greens. The trick to making this is not adding water. Greens when chopped and salt is added, give out water. This helps moisten the dough. If we add more water, we will not be able to shape the dough.

Tip for Healthy living:


Eating greens is a great way to get several essential nutrients into your body.Green leafy vegetables are not only a great source of iron, folate, vitamins K , it is also a great source of calcium!They provide the much needed dietary fiber and help prevent/control conditions like diabetes, blood pressure, obesity and high-cholesterol.

Food for thought:


A cloudy day is no match for a sunny disposition. Unknown

Monday, October 5, 2015

Moong bean sprout salad ; Meatless Monday


I love sprouts. I sprout moong beans, methi ( fenugreek)seeds, kala Chana( chick peas), chawli ( adsuki beans), kulith( horse gram). Often I add them in a salad with the sprout being the main ingredient. I have previously shared with you the recipe for methi ( fenugreek) sprout salad. Today, I am going to share with you the recipe for moong bean sprout salad that I made for dinner last night. Honestly, I enjoy these kinds of salads more than the ones that have greens. These salads are filling, rich in protein content and can even be used the next day for lunch without the salad wilting and becoming all soggy on you. It is also a complete meal with all the essential components of a balanced diet. Last but not the least, it is super-easy to make( I know this is my favorite phrase)! ;)


Servings : 4-6


Ingredients:


Moong- bean sprouts: 2 cups
Water: 1/2 cup ( for cooking the sprouts)
Corn kernels: 1 cup ( I used fresh kernels from a corn cob that I steamed).
Cucumber: 1 small, diced.
Onion: 1 small, chopped fine.
Red pepper: 1/2 small-sized, diced
Green pepper: 1/2 small-sized, diced
Spring onion: 2, chopped fine.
Pomegranate seeds: 2 tbsp ( optional)
Peanut halves: 2 tbsp ( optional)
Lemon juice: 2 tbsp
Lime juice: 2 tbsp
Salt: as per individual taste
Black pepper: 1/4 tsp ( can be adjusted as per individual taste.

Method:


Cook  the moong-beans sprouts in 1/2 cup water with a pinch of salt for 3- 5 mins. The moong beans should be cooked just so much that it is no longer raw. Cook it only until partially cooked. Do NOT overcook it! Once cooked, drain the water and keep aside.

If you prefer to eat raw sprouts, skip the above step completely!

In a salad bowl, add the drained sprouts and all the ingredients listed above. Mix well.


This salad can be served at room temperature or chilled!

Enjoy. I am linking this salad to Fiesta Friday #89. Mila@milkandbun & Kaila@GFlife247 are co-hosts this week. I am also bringing this to Throwback Thursday and Saucy Saturdays.

Cooking made easy:


I have said this is several times before when I have spoken about salads like chick-pea salad, quinoa black bean salad etc. Ingredients for a salad are not written in stone ( unless you are following a specific recipe).  I know for sure that the salads I rustle up are with ingredients that are available on hand and whatever catches my fancy. Out of the ingredient list provided above for this salad, you can add and subtract as per your preference and availability. USE WHAT IS AVAILABLE.

Tip for healthy living:


Sprouts are very nutrient-dense and therefore provide immense health benefits. They are low in calories, rich in dietary fiber, vitamins B, C and K. It also contributes to the daily dietary intake of iron. It is of course a good source of protein for vegetarians.

Food for thought:


Being willing makes you able. Unknown

Friday, October 2, 2015

Moong bean sprouts pulao/ pilaf


Ever since I was little I remember my mother making sprouts and curries using the sprouts. There is a very traditional konkani dish that is made called muga ghashi which translates to moong bean sprout curry. You can find the recipe for the same here. My mother also makes moong bean sprout salad. I use moong bean in a variety of dishes. This time I decided to make pulao/ pilaf with it and I must say that it was really good. I regularly make pulao. But this time I wanted to make something that the kids would eat too. I was pleasantly surprised when my kids ate the pulao without even noticing it!  Mission accomplished! This is a very quick and simple recipe wherein one can utilize leftover cooked rice. It is also a great way to get your children to eat healthy. This is a one pot meal that can be had for breakfast, lunch or dinner.I am bringing this to my friend Angie's Fiesta Friday #88! A party I try not to miss! To top it, my friends Julie@ Hostess at heart and Liz @ Spades, spatulas and spoons are co-hosting this week!


Servings: 4-6 ( 1.5 cups per person)


Ingredients:


Cooked rice : 4 cups
Moong bean sprouts: 2 cups
Sliced mushrooms: 1 cup
Coconut oil: 1 tbsp
Onion: 1 medium-sized, chopped
Cloves: 2 nos
Cinnamon: 1 inch stick
Cardamom: 1-2 pods
Bay leaf: 1 small
Cumin seeds( jeera): 1/2 tsp
Green chillies: 1-2 , chopped fine, adjust as per individual taste.
Bell pepper ( capsicum): 1 small, diced small.
Cilantro, chopped: 1/4 cup for garnishing

Method:


Heat oil in a sauté pan/ kadai. Add cumin seeds, cloves, cinnamon, cardamom and bay leaves, one after the other. Sauté for 10-15 seconds.

Now add the chopped onions and cook it until it turns a little golden in color.

Add the chopped green chillies, moong bean sprouts and salt. Cook until the moong beans are partially cooked.

Add in the mushrooms and bell peppers and sauté for 2 minutes. 

Add in the cooked rice and toss well until everything is nicely mixed. 

Add/garnish with coriander leaves.


Serve hot with a raita of your choice.


Served with cucumber slices and easy chicken curry.


Cooking made easy:


Whenever I make sprouts, I cook it for 10 mins on the stove top or until slightly tender and then store it in the fridge to use as needed. You could make a lot of things with that, for example: salad, ghashi, pulao etc.

Tip for healthy living:


Experts recommend 4-5 servings of vegetables daily.You can increase the vegetable servings in your family's diet by trying to incorporate veggies into everything that you cook. If you are making sambar, you can add a lot of veggies, instead of just a little. If you are making one-pot dishes like pulao, fried rice, noodles, pasta, try to incorporate more vegetables into it. If your family is not used to eating vegetables, start by adding 1-2 vegetables that have been finely chopped and then gradually increase the number of vegetables added over a period of time.

Food for thought:


Anything unattempted remains impossible. Unknown