Showing posts with label snack. Show all posts

Monday, October 31, 2016

Sabudana Wada ( Fritters made from Tapioca pearls).


Sabudana ( tapioca pearls) is one of the most commonly consumed item during fasting. Sabudana is basically tapioca pearls. Sabudana can be used to make kheer ( pudding), khichidi , thalipeeth ( pancakes), idlis and wadas. For all these items, Sabudananeeds to be soaked in water for 3-4 hours first and is then used. Dry Sabudana pearls are hard and therefore inedible. Soaking it in water makes it soft , tender and edible. Today, I am sharing with you the recipe for Sabudana wadas that is super-easy, quick and delicious.


Servings: makes around 6-8 wadas

Prep time: 3 hours ( includes soaking time)

Cook time: 10 mins 

Total time: 3 hours & 10 mins


Ingredients:


Sabudana: 1/2 cup
Potato: 1 medium sized
Green chillies: 2-3, finely chopped
Cumin powder: 1/4 tsp
Coriander leaves: 1 tbsp, finely chopped
Crushed peanut halves: 2 tbsp ( optional)
Salt/rock salt/ sendha namak: 1/8 tsp
Sugar: 1/2 tsp
Oil for frying or greasing the appe pan.
Water: for soaking Sabudana and boiling potato.

Method:


Soak Sabudana for 3-4 hours with just enough water to cover it.


Boil whole potato with skin, in water, until tender enough to mash, around 10-15 mins.

When the potato has cooled, remove from water, peel, dice and mash it coarsely without adding any water.


To this add chopped green chillies, cumin powder, salt, sugar, soaked and drained Sabudana, coriander leaves, crushed peanuts and mix well to make a dough.


Pinch lemon sized portion of dough and shape it into a ball. Gently pat it down to shape it into a patty. 


Do this with all available dough and keep aside.

You can fry it using the deep-fried method or the using the appe pan ( healthier version). If using the appe pan, don't flatten the ball too much.

For deep-fried version:

Heat oil on medium heat in a small wok/ frying pan. 


Once the oil is hot enough, add the prepared patties into the oil.

 Do not drop more than 2-4 at a time as it will overcrowd the pan. If overcrowded, it will not fry well.


Fry for 2-3 mins on one side or until golden brown. 

Flip and fry for 2-3 mins on the other side. Drain onto paper towels.

Serve hot with a chutney of your choice.

Appe pan method: ( healthier version)

Heat the appe pan on medium heat. 


Grease the appe pan thoroughly. 

Place the prepared balls of dough into the indentations in the pan. 

Cook for 3-4 minutes on each side or until cooked thoroughly.

Serve hot with a chutney of your choice.


Enjoy.

Cooking made easy:


How do you know if your oil is hot enough??
If you drop a little drop of batter into the oil, it should come up and float on top of the oil. This means the oil is at the right temperature.
If the batter sinks, the oil is not hot enough.
If the oil is smoking, then the oil is too hot and most likely will burn the food.

Tip for healthy living:


Any given day, cooking something in the appe pan is healthier than deep-frying as the appe pan uses less oil and therefore the calorie content of the food item is less.

Food for thought:


True friendship is like sound health; the value of it is seldom known until it is lost. Charles Caleb Colton

Monday, August 1, 2016

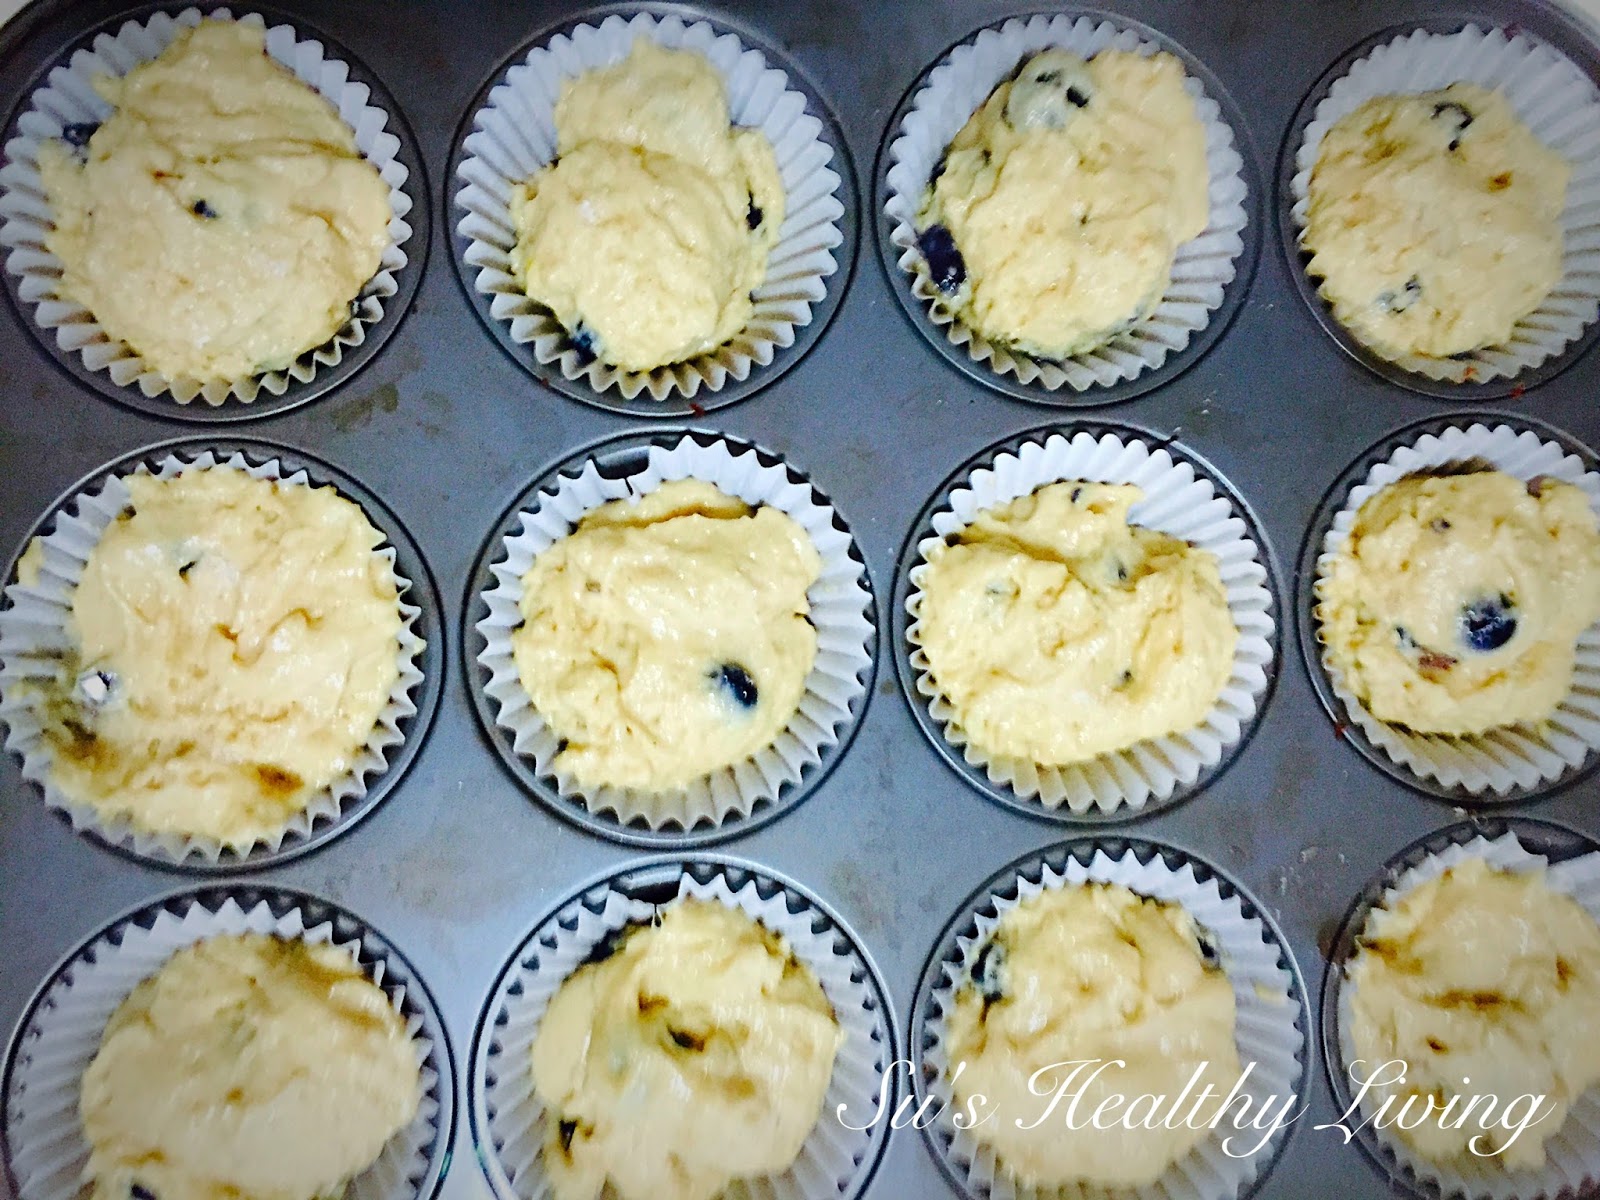
Blueberry Muffins ;Meatless Monday


For the longest, my son has been asking me to make blueberry muffins for him. I keep thinking that I will make them tomorrow, but then I get side tracked by so many things that "tomorrow" never came until last week! 


Recently I came across Lily's blueberry buttermilk muffins on Fiesta Friday! They looked so good that I had to make them!! I modified the recipe based on what I had available at hand.You can find the original recipe here


The muffins were delicious! They were gone before I knew it! My son was so happy when he saw the muffins in the oven, that it made me feel guilty for not making it sooner! He ate one as soon as it came out of the oven!! It was so good that I ended up making it twice in one week!! Here is the easy recipe!


Prep time: 10-12 minsCook time: 15-20 mins

Total time: 25-30 mins


Servings: makes 12 muffins


Ingredients:


Flour: 2 cups
Baking powder: 1 tbsp
Salt: 1/4 tsp
Cinnamon powder: 1/2 tsp
Blueberries: 1 cup
Egg: 1 large
Melted butter: 2 tbsp
Ghee ( clarified butter): 2 tbsp ( you can use just butter or just ghee).
Sugar: 1 cup ( I used brown sugar, any sugar can be used).
Vanilla essence: 1 tsp
Yogurt ( curds) or buttermilk: 1 cup
Note: use of yogurt will make your batter thicker while use of buttermilk, thinner. I didn't see much difference between the two in the end result. You could use either/or and you will be fine.

Method:


Preheat the oven to 425 degF.
Grease or line a muffin tray and keep ready.

In a big bowl mix together all the dry ingredients: flour, baking powder, salt and cinnamon powder. Mix well.

Gently fold in the blueberries. Keep aside.

In a smaller bowl, using a whisk together melted butter, ghee, sugar, egg & vanilla essence until homogenous. Now add the yogurt/buttermilk and whisk again.

Slowly add the wet mixture into the dry one. Mix gently until it is all mixed . Do not overmix.


Using an ice cream scoop or spoon, divide the mixture equally among the 12 muffin cups.


Place the tray on the middle rack of the oven. Bake at 425 deg F for 5 mins. The. Reduce the temperature of the oven to 375 deg F. and bake for 10-12 mins or until the toothpick comes out clean.


When done, take the tray out and let it cool down before taking the muffins out!

Well, there is nothing better than a warm muffin right out of the oven!!


Enjoy!


Cooking made easy:


These muffins remain fresh for 2-3 days if left outside and up to a week if kept in the refrigerator, in an airtight container. They freeze well and can be thawed and used as needed. It is a great breakfast option! You can bake a batch and use it for the week.

Tip for healthy living:

Try innovative ways to get fruits and vegetables into your kid's diet. Fruit based muffins are a great idea as long as you don't make them too sweet. Children require 3-4 servings of fruits and vegetables every day!

References:


Food for thought:


We all need people who will give us feedback. That's how we improve. Bill Gates


Please do share your thoughts. Your opinion matters!


Friday, May 27, 2016

Guest Post Series: Besan ki Phulki (a GF snack), by Shaheen Ali


I hope you all liked Shobana Rao's Lobia Suva Bhaji Subzi last week!
My guest today is a young, dynamic & bubbly person who is a die-hard foodie, Shaheen Ali! She hails from a gastronomic family and started her blog Spoonfork&food in 2014 to document and share her experiences with food. Her amazing photography skill makes her blog a visual treat! Her blog recently celebrated it's second anniversary and even better, it just moved to it's new abode! Now that is what I call growth! Shaheen is a young mother with one son. She lives in India with her family.

Like me, she is a physical therapist by profession and understands the importance of eating healthy! Today, she is sharing with us a popular snack from Uttar Pradesh ( a Northern Indian state), Besan ki Phulki. This is a gluten-free snack made with chick-pea flour and served with a spiced, tangy yogurt-based sauce. Shaheen has made this traditionally fried snack healthier by cooking it in the appe pan. Do check this recipe out and also head to Spoonfork&food to check out all the other wonderful recipes and feast on it with your eyes!


Besan ki Phulki is a typical refreshing and flavorful snack of Uttar Pradesh. It's gluten free and makes an amazing snack option for weekend brunch parties. The dish can also be teemed up with mutter ki chaat. Though the original recipe asks for a deep fry technique, but to make it more healthier I opted for Appe Pan. Yes ! with just a few drops of oil, the phuklis get ready in no time and is a blessing to all the weight watchers like me. 


Preparation Time : 5 mins 

Cooking Time : 15 mins 
Total Time : 20 mins 
Course : snack
Cuisine : North Indian 
Yields : 4 servings 

Equipment Required : Appe Pan / Panniyaram Pan

Ingredients :

  • Phulki
  • 1 1/4 cup chickpea powder/ besan
  • 2-3 cloves garlic, minced
  • 1/2 tsp Salt
  • 1/2 tsp freshly ground black pepper
  • 1/2 to 2/3 cup water
  • Pinch Of Baking Soda
  • Spiced Yogurt
  • 600 gms yogurt, whisked
  • 1 tsp black rock salt
  • 3 cloves minced garlic
  • 1 finely chopped green/red chili
  • Few drops of oil for pan frying


Steps : 


1. Place all dry ingredients for phulki in a large bowl and stir to mix. Start adding water gradually and whisk to make a smooth batter. Make the batter till pancake like consistency.
2. Whisk yogurt with black rock salt, garlic and green chili until smooth. Taste and adjust seasoning. 

3. Heat few drops of oil in each section of Appe pan and drop 1/2 teaspoonfuls of batter gently into each  without overcrowding, close the lid and fry over medium heat for 2-3 mins or until light golden brown. Flip and repeat.
4. Remove the first batch and place them in the serving bowl and top with little yogurt. 
5. Again pan fry the second batch and place them over the topped yogurt. Repeat the same till all the yogurt is consumed.
6. Garnish with freshly chopped coriander, chopped green chilies and also some sev if you prefer. You can also use pomegranate pearls to garnish. 
7. Chill for about an hour and serve as a snack in your brunch parties. 

Enjoy!


I am bringing this delicious dish of Shaheen's to all my friends at Throwback Thursday#40, Fiesta Friday#121  and Saucy Saturdays#47


Please do share your thoughts. Your opinion matters!


Monday, May 9, 2016

Ice-Cream Sandwiches; Meatless Monday


Feeling hot hot hot ... That's the song that has been stuck in my mind! Well, literally, it is getting hot, with warmer temperatures here and scorching u relenting heat in India! Kids and adults alike are looking for ways to cool themselves down! What better than ice cream to cool yourself?? My daughter has been asking for ice cream sandwiches for a while now. I have been stalling her saying that when it gets warmer, I will make them for you. I don't like my kids eating cold, frozen stuff during winter for fear that they might get sick ( yes, I know that is a myth, but I  can't help being a mom). This past weekend she goes, " Mommy it is warm now. Are you going to make ice cream sandwiches now??" I replied, " of course!" Her next sentence was : can I help? I said yes and together we set out making these cute little beauties!


Well, I cannot claim much credit for the recipe. It is literally ice cream sandwiched between 2 cookies! A friend of mine helped me with the nitty-gritty. So technically this is semi-homemade. I bought the ice cream and the cookies from the store, assembled the sandwiches and stuck it back in the freezer! When my blogger friend Sonal invited recipes for a semi-homemade collective, she specifically told me that she was looking for a recipe that was fun! Now who can say "NO" to ice cream & cookies?? Very few people ( read: me!). While any kind of ice cream and cookies would do, I have used regular Chocolate chip cookies and  Double Chocolate Chip cookies with M&Ms for the cookies. I used a basic chocolate and vanilla ice cream. My daughter likes chocolate and my son likes vanilla! Also, they made for a good contrast with the cookies.


Want to use home-made chocolate chip cookies and home-made ice cream? Go ahead, and use it! It is much healthier!

Note: These treats are by no means healthy! However you can make them healthy. Here is the skinny on it! Use frozen yogurt or banana ice cream instead of the regular ice-cream. You know I always have the healthier alternative for you!


These ice cream sandwiches are super-easy and fun to make! They make for a great summer vacation activity for you to do with your kids. You can bring them with you to picnics in the park( make sure you use a cooler to transport them) and barbecues in your backyard!


Do try it, you will enjoy it just as much as my kids and I!

Servings: makes 12 medium-sized ice cream sandwiches.


Ingredients:


Ice cream: 1/2 tub of any flavor ice cream ( I used a mix of vanilla and chocolate ice cream).
Cookies: 1 box of large chocolate-chip cookies.( you may not use all as you need only 24 cookies).
Plastic Cling-wrap : to wrap the cookies.


Method:


Keep the tub of ice cream out of the freezer at room temperature for a few minutes so that the ice cream is softened a little and can be handled easily. The time period that you keep the ice cream out depends on the temperature in your area/ home. The ice cream should not become liquid/runny.

Lay out 12 cookies upside down in a single layer on a tray. Keep the cling film roll handy.

Using a small melon scooper or cookie scoop, scoop a ball of ice cream and place it on the cookie. Keep another cookie on top of the ice cream scoop and press down gently, slightly. Now cover the sandwich in a plastic cling wrap tightly and place it in a container.

Repeat this with all the rest of the cookies.

Place the container in the freezer for minimum of 2-3 hours.

To serve: remove the plastic cling wrap and serve!


Enjoy!!


I am bringing these amazing crepes to all my friends at Throwback Thursday#38Fiesta Friday#119  and Saucy Saturdays#45! Angie's co-hosts this week are Ahila @ A Taste of Sri Lankan Cuisine and Diann @ Of Goats and Greens.


Cooking made easy:


The size of the scoop of ice cream depends on the size of the cookie. The ice cream scoop should be proportional to the cookie size. Don't place too big a scoop, as when you place the cookie on top and press down, the ice cream will ooze out!!

Again, any shape/ type of cookie can be used, except that they should be big in size.

Tip for healthy living:


Food that we consume has to be healthy and balanced. Everything in moderation. Everyone is allowed to cheat/ indulge every once in a while. As long as it is in moderation and you are good most of the time. After all, we want to live our lives fully and not feel deprived!

Food for thought:


Intelligence is the ability to adapt to change. Stephen Hawking


Please do share your thoughts. Your opinion matters!


Thursday, April 28, 2016

Guest post series: Quinoa-Beet Patties by Preethi Prasad


I hope all of you enjoyed Sushma Mallya's Dahi Bhendi/ Bhendi Sasam last week. This week we have a very enthusiastic, health-conscious, innovative, new kid on the block ( of blogging world) Preethi Prasad from Preethi's Cuisine. She hails from Bangalore and has been residing in Singapore since 18 years.


Like many of us, Preethi is a working mother. She has two boys ages 16 and 11 who love to eat! While Preethi has always cooked as a hobby, she started actively cooking and experimenting with food a couple of years ago. She then wanted to document and share her experiments in the kitchen with others. With this intent, Preethi's Cuisine was born. Her blog is turning one on . I wish her much success! She has many healthy and innovative recipes on her blog. Do visit her blog Preethi's Cuisine for all the yummy recipes.


Today, Preethi is sharing with us a delicious recipe of Quinoa & Beet Patties. Preethi says: "These yummy patties are loaded with the goodness of Quinoa and other multigrains and beetroot. It is easy to make and can be used in Burgers too".


Servings: makes 12 medium-sized patties


Ingredients:


3 Beetroots 
2 Potatoes 
1”Ginger
4 Garlic Cloves
1 Cup Quinoa cooked in Vegetable stock 
1.5 Tsp Garam Masala
2 Tbsp Gram Flour/ Besan
1 Tsp Chilli Powder
Salt to Taste
1 Tsp Jeera
1 Tsp Chaat Masala
1 Cup Multigrain Powder( A mix of roasted and powdered Green Gram ,Flax seeds and Chia Seeds)
1 Green Chilli
Finely Chopped Coriander


Method:


Pressure cook Beets, Potatoes, green chilli,Ginger and Garlic with 1 glass of water for up to four whistles. In case the beets are not fully mashed, blitz once in a blender to get a fine paste. 

Put all the boiled veggies in a wide bowl without the stock .

Use the Vegetable stock to cook Quinoa as per the instructions on the package.

Add all the masalas( spices),  besan, coriander, jeera,multigrain powder and salt to the boiled veggies and mix well. 

Take a small quantity of the mixture and give a round shape. Repeat this process for the balance mixture.

Heat a heavy-bottomed pan. Smear a teaspoon of oil to the bottom of the pan. Place the round patties and cook on both sides with a teaspoon of oil.

Enjoy these yummy patties with green chutney!!!!


I am bringing this lovely dish of Preethi's for all my friends to try at Throwback Thursday#36Fiesta Friday#117 and Saucy Saturdays#42! The co-hosts this week are two excellent bloggers, Mollie @ The Frugal Hausfrau and Scarlett @ Unwed Housewife.


Please do share your thoughts. Your opinion matters!


Monday, April 4, 2016

Kele phodi ( Pan-fried Sweet Plantain); 3 ways! Meatless Mondays!


Fried plantain is common not only in Hispanic cuisine but in the Caribbean and Indian cuisines too!  Almost all of the South Indian states make does sweet plantains in one form or the other. They are usually eaten as a snack with a cup of tea but may be also served as a side with a meal.


Where I am from, we make it in three different ways. My mother never deep-fried the plantains. She always pan-fried it with very little oil. Specific plantains are used for this recipe. They are called as Nendrabale.


I am going to show you all three ways to make fried plantains. I like them all, depending on my mood.


Servings: 3-4


Ingredients:

Ripe plantains: 2
Salt: as per individual taste
Coconut oil: to grease the skillet/ tawa/ griddle

For the plain version:
Red chilli powder: 1/4 tsp

For the rice flour version: all the above ingredients +
Rice flour: 2 tbsp

For the sooji rava version: all of the above +
Water: 2 tbsp
Cream of wheat/sooji rava or/cornmeal: 1/4 cup

Method:

Peel the plantain. Slice them horizontally into 3 equal pieces.

Now vertically slice each individual piece into 3-4 slices depending on your desired level of thickness and the thickness of the plantain. You don't want the slices to be too thin.

Arrange the slices on a plate.


For the plain fried plantains:


Mix together salt and chilli powder. Sprinkle this mixture on top of the plantain slices, on both sides.


Heat the skillet/tawa on medium heat. Grease it using coconut oil.Once the skillet is hot, place the plantain slices on it.


Cook on low flame until lightly golden brown( around 3-4 minutes on each side).


Serve hot.

For rice flour coated fried plantains: 


In a shallow bowl/ plate, mix together rice flour, salt and red chilli powder.


Dip the cut plantain slices into this mixture.


Heat the skillet/tawa on medium heat. Grease it using coconut oil.Once the skillet is hot, place the plantain slices on it. 

Cook on low flame until lightly golden brown( around 3-4 minutes on each side).


Serve hot.


For the sooji rawa coated fried plantains:


In a shallow bowl/ plate, mix together rice flour, salt, red chilli powder and water to make a paste.


Smear this paste on both sides of the plantain slices.

Take the sooji rava/ cornmeal in a plate.

Roll the batter-coated plantain slices into this mixture so that it is coated with rawa/ cornmeal.


Heat the skillet/tawa on medium heat. Grease it using coconut oil.Once the skillet is hot, place the plantain slices on it in a single layer.


 Cook on low flame until lightly golden brown( around 3-4 minutes on each side).


Serve hot.

Enjoy! I am bringing this to Fiesta Friday & Saucy Saturday. The co-hosts this week at Angie's Fiesta Friday are two excellent bloggers  Sonal @ simplyvegetarian777 and Laurie @ ten.times.tea. I know I am late for all the parties, but I truly believe in the adage, " better late than never!"

Cooking made easy:


Whenever you want to pan-fry something and use  less oil, make sure that the skillet/ griddle is hot enough at the beginning, but after that maintain a constant temperature that does not cause the food to burn but cooks it well. To much fluctuations in the temperature might prove detrimental to effective cooking.

Tip for healthy living:


While cooking, always look for healthier ways to cook any given recipe. Steaming/ broiling/ baking is better than frying . Pan-frying is better than deep-frying.

Food for thought:


One can never consent to creep when one feels an impulse to soar. Hellen Keller


Please do share your thoughts. Your opinion matters!