Showing posts with label appetizer.. Show all posts

Friday, November 25, 2016

Stuffed Mini-Peppers


Guests still home after Thanksgiving?? Bored of eating leftovers?? Not in a mood to cook anything tedious?? Here is the perfect solution for all of these problems!


Try these stuffed mini-peppers that use ingredients that you  already have in your kitchen, doesn't take long to put-together & is a crowd-pleaser!!


When I made these, I ate half a dozen of them right when they came out of the oven!! My husband loved them and so did everybody else! It was gone before I knew it. The best part: it is also a great make-ahead item for get-to-gethers! You can stuff the peppers and keep it in the refrigerator a day ahead and bake it just before guests arrive. Or, you could bake it and keep it in the fridge couple of days ahead of time and then just warm it up when your guests arrive & serve it piping hot! Your guests will be quite impressed: I guarantee!!


Do try it. You will love it!


Servings: 8-10


Prep time: 15 minsCook time: 8-10 minsTotal time: 23-25 mins


Ingredients:


Sweet Mini-peppers: 16-18 nos
Low fat cream cheese: 1 package ( 8 oz or 222gms)
Dried Italian herbs : 1/2 tsp
Garlic cloves: 2, minced
Black pepper: 1/4 tsp, freshly ground.
Cilantro/coriander leaves: 1 tbsp ( freshly chopped)
Olive oil : to drizzle

Method:


Take the cream cheese in a bowl. Whip it lightly using a fork until softened and creamy. To this, add the dried herbs, cilantro, black pepper & mix well. Keep aside.

Preheat the oven to 350 deg F.

Arrange a baking sheet lined with foil or parchment paper.


Wash and dry the peppers. Slice it into 2 without cutting the stem. You will end up with one half of the pepper with the stem and the other half without the stem. Remove the seeds and discard them.


Fill each of the halves with the cream cheese mixture prepared earlier. Arrange the peppers on the baking sheet in a single layer with the filled side facing up.

Lightly drizzle olive oil in the peppers. Place the tray on the middle rack of the oven. Bake at 350 degF or 180 degree Celsius for 8-10 mins.


Serve hot!


Enjoy!


I am bringing this to Fiesta Friday #147,  & Saucy Saturdays#72. Angie's co-hosts this week are: Julianna @ Foodie On Board and Hilda @ Along The Grapevine.

Cooking made easy:


The peppers used for this dish are sweet Mini-peppers. You can choose other kind of peppers that are not too "hot" or "spicy".

I have altered this recipe at times and added a kick to it by adding finely chopped jalapeƱos to the cream cheese mixture.

You can also use other healthier options like quinoa salad for the stuffed peppers. The choice is yours.

Tip for healthier living:


I have made this recipe healthier by substituting low-fat cream cheese instead of the regular cream cheese. This is one example for how you can indulge in regular food/treats by altering it slightly to make it much healthier for you and your family.


Food for thought:


An appeaser is one who feeds a crocodile, hoping it will eat him last. Winston Churchill


Please do share your thoughts. Your opinion matters!


Let us stay connected on Facebook Pinterest | Twitter | Instagram | Google+ 

Friday, February 5, 2016

Peach-Mango Salsa Stuffed Mushrooms


Are you ready for Game-Day yet?? SuperBowl50 is on January 7th. Who is going to take the trophy?? Peyton Manning of the Denver Broncos who has been hinting that this might be his last game, or Cam Newton of Carolina Panthers?


Either ways, we shall have plenty fun at the tailgating parties!! Are you still looking for something quick to make?Or may be something to bring to a party? Are you out of options for your vegetarian/ vegan/gluten-free friend??


Here is a recipe that could be the answer to all your problems! It is quick and easy to make, ingredients are few and can be gathered in just one run to a nearby supermarket/ grocery store. There is not much prep or baking time involved and is perfect for your vegetarian/ vegan/gluten-free friends.


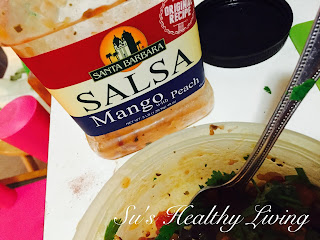
I have made these stuffed mushrooms by using some peach-mango salsa that I wanted to get rid of. I had bought a jar of peach-mango salsa for my son's birthday from Costco. Of course, the entire jar was not finished and I am not the kind who snacks on salsa and chips. I was planning to use it to make some fish or chicken, but when I had this big box of Baby Bella mushrooms, I felt like making this instead. I made it and had an entire platter of mushrooms alone for dinner! It is truly delicious. All you need is some salsa of your choice, mushrooms of your choice and a little bit of shredded Parmesan cheese. For the vegans, just skip the Parmesan.You can make your own salsa if you wish, like I have done here .


Let me tell you the recipe in detail:

Servings: 4 ( about 4-5 mushrooms each)

Ingredients:


Baby Bella mushrooms: 20, cleaned ( White Cremini mushrooms can be used as well).
Peach-Mango Salsa: 1 cup ( may not need all),( any salsa can be used)
Hot sauce: 1/2 tsp ( optional)
Cilantro, chopped: 1 tbsp
Shredded Parmesan cheese: 1/4 cup ( may not need all)

Method:


Remove the stems of all the mushrooms and keep aside the mushroom caps.

Preheat the oven to 450 deg F.


In a bowl mix together peach-mango salsa, chopped  cilantro and hot sauce.


Finely chop the mushroom stems and add it to the above bowl. Mix well.

Layer a baking sheet with parchment paper and keep ready.


Fill the mushroom caps with the above mixture.


Top each mushroom with shredded Parmesan cheese.


Arrange them upside down on a baking sheet.

Place the baking sheet on the middle rack  of the oven.

Bake at 450 deg F for  10 mins.


Best served immediately!

Enjoy! I am bringing these goodies to the parties at Throwback Thursday, Fiesta Friday and Saucy Saturday. Lily @ Little Sweet Baker and Julianna @ Foodie On Board are Angie's  co-hosts this week at Fiesta Friday.


Cooking made easy:


Quite often people are perplexed as to how to clean mushrooms or the best way to clean them. Mushrooms are best cleaned just before using them. Read this post to learn more about cleaning mushrooms.

Tip for healthy living:


Mushrooms are highly nutrient-rich.Apart from several important nutrients like niacin, riboflavin, potassium and vitamin D, mushrooms are also rich in selenium which is an antioxidant  and mood- elevator.Mushrooms are purported to boost the immune system and also help in weight loss. 

References: 
http://articles.mercola.com/sites/articles/archive/2013/05/13/mushroom-benefits.aspx
http://healthyeating.sfgate.com/benefits-can-eating-mushrooms-4412.html
http://www.webmd.com/food-recipes/types-of-mushrooms


Food for thought:


Once you label me you negate me. Soren Kiekegaard


Please do share your thoughts. Your opinion matters!

Monday, January 25, 2016

Vegetarian Buffalo "Wings" ( can be vegan); Meatless Monday.


Super Bowl is in two weeks with the Denver Broncos facing the Carolina Panthers. This also means that there will be lot of Super Bowl parties! Usually at these parties there is tons of junk food laid out, the most popular being chicken wings!!! All kinds of chicken wings! But not everyone eats chicken wings. Many people are vegetarian for various reasons. Some for religious reasons while others  in pursuit of better health. Regardless, being vegetarian does not mean that they do not enjoy food. Therefore, it is important that there are vegetarian options at all gatherings, parties. Today, I am sharing with you the recipe for the vegetarian version of Buffalo Wings. Yes, you heard right, Buffalo Wings. I guarantee you that once you try this, you will make it again and again. The original recipe is from PETA! Even I didn't know that they had recipes too. I improvised on the recipe that I saw here.  Cauliflower is used to make these "wings".


The improvisations I made were with the goal of reducing calories. Did you know that a lot of butter is used in chicken wings?? The milder the buffalo wings, the higher it is in calories! This is primarily because they use butter to lessen the impact of the hot sauce. The recipe I followed, instructed to toss the wings in the sauce. Instead, I chose to brush them with sauce. This significantly lowered the calories. I also reduced the calories in the blue-cheese dressing by mixing it with Greek yogurt. It was delicious!


I also didn't have garlic powder alone, so mixed adobo seasoning in the mix.
This is a very easy recipe to make and does not take long, 30-40 minutes at the most!


I brought the vegetarian wings to my neighbor and to my colleagues at work. Everyone loved it! I was thrilled.


Servings: 6-8


Ingredients:


Cauliflower: 1 small head
Flour: 3/4 cup
Garlic powder: 1 tsp ( I used Adobo seasoning instead).
Buttermilk: 1 cup
( for vegans, use same amount of soy/almond milk ).

For the sauce:

Hot sauce: 1/2 cup
Butter: 1/2 cup ( alternatives like margarine, Country Crock or olive oil may be used for vegan options)
Salt: 1/8 tsp ( skip if you used Adobo seasoning with the flour)
White Vinegar: 1/2 tsp

To serve:

Blue-Cheese dressing: 1/2 cup ( use vegan cheese if vegan).
Greek yogurt: 1/2 cup ( use vegan yogurt like SILK,  for vegan option)
Celery sticks : 4-5 celery stalks, cut into 5 inch pieces.

Method:


Preheat the oven to 450 deg F.

Cut the  cauliflower head into bite-size pieces. Wash, drain completely and keep aside.


Mix together the flour, buttermilk, garlic powder and keep aside.


Line a baking sheet with parchment paper or aluminum foil and keep ready.

Dip each cauliflower piece in the flour-buttermilk mixture and place it up on the baking sheet. Do this with all the available cauliflower.


Place the baking sheet on the middle rack of the oven and bake at 450 deg F for 20 mins.


While the cauliflower is baking,  prepare the sauce and dip.

To prepare the sauce:

Mix together the hot sauce, butter( or margarine or oil), vinegar and salt and bring it to a gentle boil.


For the dip:

Mix equal proportions of Greek yogurt and blue cheese. Keep aside.

Putting the wings together:

Once the cauliflower pieces are baked, take them out, brush them thoroughly with the "Buffalo sauce". Place the wings in the oven for 8-10 minutes.

Brush them again with Buffalo sauce of needed.


Serve them hot with blue cheese dip and celery.

I am bringing this to Throwback Thursday # 23, Fiesta Friday # 104 and Saucy Saturdays. Angie's co-hosts this week are Mila @ milkandbun and Hilda @ Along The Grapevine.

Cooking made easy:


Use warm water with a pinch of salt to soak the cauliflower pieces for a few minutes. Drain it completely and pat the pieces dry with a paper towel before dipping it in the flour.

Tip for healthy living:


Cruciferous vegetables are known or their health benefits. Cauliflower is one of them that contains a plethora of nutrients that includes vitamins, minerals, antioxidants  and phytochemicals. Some of the major health benefits of cauliflower include it's anti-inflammatory properties, detoxification of the body, boosting brain health due to the presence of choline, boosting of heart health due to the presence of sulforaphane and most importantly, cancer-fighting properties.  So, eat more of the cauliflower! 

References:
http://articles.mercola.com/sites/articles/archive/2014/02/22/cauliflower-health-benefits.aspx
http://www.whfoods.com/genpage.php?tname=foodspice&dbid=13
http://www.medicalnewstoday.com/articles/282844.php
http://www.webmd.com/diet/cauliflower-health-boost


Food for thought:


Men stumble over pebbles, never over mountains. Marilyn French


Please do share your thoughts. Your opinion matters!


Friday, October 31, 2014

Halloween special: Messy sausage mummy!


I didn't know what Halloween was until I came to this country! I used to read about it in books and wonder what kind of celebration/ festival is this?? Well, I still don't know! Why is Halloween celebrated?? Do you know?? Hence, it is hard for me to generate the required enthusiasm for this particular celebration. Why? I don't see a point to it! But I do do a little something because of the kids! I am the kind who runs around the last minute! Then again, I have no Halloween party to go to, my daughter's school doesn't allow them to come to school in their costume and my son is too little to know anything!! Ok, ok, I am not a party spoiler! That is why I dressed my daughter in her favorite Princess Aurora costume and my son as his favorite character Winnie the Pooh! Awww.. They looked so adorable & soo happy! That is why I even came up with a Halloween- themed snack! Sausage mummies!! I came across this by chance at work on tv!! I liked the idea of it and decided to make them! It looked super-easy to make! You can find the original recipe here. But by the time I made it ( after trick-a-treating and in between laundry), it seemed like a Herculean task! I just didn't have the patience to make long ropes and patiently wrap it up! I was wayyyy too tired. I just wrapped them and baked them! That is why I named them messy mummy! Someday, when I have patience I will make it again and post better pictures!.


Here is the step-by-step of my version of the recipe!

I am bringing these messy mummies to Angie's Fiesta Friday! I am so excited to share the concept of it with all my friends there! Happy Fiesta Friday and Happy Halloween everyone! This week Jhuls and Margy are co-hosting.

Servings: 5 ( two per person)( nobody can eat just one!


Ingredients:


Turkey sausages: 1  package of 10 sausages.( any sausage can be used; we don't eat meat, hence turkey)
Pillsbury biscuit: 1 package ( makes 10 biscuits)
Mustard : as needed to make eyes.

Method:


Take a single sausage . At the junction of the upper 1/3 and lower 2/3 cut the sides of the sausage to make arms, as shown in the picture.


No make a slit in the bottom of the sausage to make legs. Leave the upper 1/3 for the head.


Take a single biscuit dough and divide it into three parts; two big equal ones for the arms and the legs and the small one for the head.


Roll the pieces into 2 long ropes and one short rope.

Using the small one, wrap the head portion of the mummy. Using one of the larger ropes, wrap one arm and leg on one side, starting from the leg working your way up. Now do the other arm and leg starting from the bottom, making the shoulder and then working your way down the arm.


Line up the mummies on a baking sheet in a single layer.

Preheat the oven to 375 degrees F.

Bake the mummies for 10-12 minutes or until they are golden brown.


Take them out and let them cool down slightly. Once cooled, make the eyes and mouth using the mustard.

Serve with ketchup or your favorite dip!


Enjoy!

Cooking made easy:


Clean-up after baking becomes a chore especially when there is drippings or the pans are burnt. You can prevent this headache by lining your baking pans/ sheets with aluminum foil. When done, all you have to do is take the foil out, gently wash the pans, dry and put them away! You can even use the foil to wrap leftover baked goodies!

Tip for healthy living:


Truthfully, even though, sausage tastes great on the tongue, I know it is not healthy. It is not good for you. You really don't know what is in a sausage!Most often, sausage is made from the scraps of leftover meat! It is also high in nitrites and sodium which is bad for the body!

Food for thought:


Good advice is always certain to be ignored, but that's no reason not to give it. Agatha Christie