Saturday, July 9, 2016

Chili Garlic Asparagus Rice


Summer is here!! Which means I don't want to spend hours slaving in the kitchen!! Not that I ever did! ;) You guys know me.. If it isn't quick and easy, it is not happening in my kitchen!! It is more so now than ever as the kids want to be more outside the house than inside! This recipe that I am sharing with you today is another of my accidentally invented recipes!! Or rather spontaneously put together recipes!


My husband likes to take his lunch from home. He loathes to eat outside food. However, his home-cooked lunch has to follow certain guidelines:
A. It cannot be a sandwich
B. Rice item is preferred.
C. It has to be vegetarian.
D. It should not smell of spices while reheating!!
E. It cannot have any kind of sauce/gravy or any other liquid component to it that may possibly leak from the lunch box!!


Well, I have been very creative and innovative with his lunches. Usually I put together some kind of fried rice/ pilaf sort of thing together for him. This particular rice is another such innovative dish which happened to come together due to a tired me on a weeknight . I had made spicy garlic sauteed asparagus and Basmati rice for dinner. I decided to rice into it. Then I remembered that I had some grilled corn in the refrigerator. I took it out, shucked the corn and added it into the rice! And voila!! A delicious dish was born!!


My husband just loved it! Here is the recipe for you to try!

Prep time: 8 minsCook time: 12 mins
Total time: 20 mins


Servings: 2-3


Ingredients:


Asparagus: 6-8 nos
Garlic cloves: 4-5 nos
Red chilli powder( medium spice level): 1/2 tsp ( the amount of chilli powder can be adjusted based on the level of spiciness of the chilli powder and of the individual.
Olive oil: 2 tbsp
Water: 2 tbsp
Cooked rice: 3 cups
Vinegar: 1 tsp
Grilled corn: 1
Black pepper powder: 1/8tsp
Scallions: 2, green part only, chopped.
Salt: to taste


Method:


Wash the asparagus. Snap off the woody stem. Break the remaining stem into 2-3 pieces depending on the length of the asparagus. Keep aside.

Mince the garlic. Keep aside.

Shuck the corn. Keep aside.

In a sauté pan/frying pan/wok, heat 1 tbsp of oil. Add the minced garlic. Sauté until garlic is fragrant. Do not burn it. Add the red chilli powder. Sauté for 10 seconds. Add in the asparagus. Sprinkle 2 tbsp water, stir fry for couple of minutes on medium-high flame. Add salt as per taste. Now lower the flame and cover and cook for 5-6 mins or until the asparagus is tender.

You can stop at this stage if you want make just chilli garlic asparagus.

To continue making the rice, add the shucked corn to the pot. Mix well. Now add the  cooked rice  ( preferably cold rice) into the pot. Fold in the rice until it is mixed. Add vinegar & black pepper powder. Toss.


Garnish with chopped scallions.


Serve hot.

Enjoy!!

 I am bringing this to Throwback Thursday #46Fiesta Friday #127  and Saucy Saturday #52. Angie's co-hosts this week are Suzanne @ apuginthekitchen and Jess @ Cooking Is My Sport.

Cooking made easy:


When I cook rice, I always cook a little more than I actually need. This way, I have some rice in the fridge on hand to rustle something up together in a hurry!


Tip for healthy living:


Eating healthy and exercising on a regular basis is a great way to keep your body in good shape and condition. 30 minutes of moderate exercise 5 days a week or 75 mins of vigorous exercise spread through the week is recommended. A minimum of one hour of physical activity every day is recommended for all individuals from 5 years of age!

Food for thought:


It is nice to have valid competition; it pushes you to do better. Gianni Versace


Please do share your thoughts. Your opinion matters!

Wednesday, July 6, 2016

Jhatpat Sevai Kheer/Sheer kurma/ Sheer Khorma ( Easy Vermicilli Pudding)


Eid al-Fitr marks the end of the 30 days of fasting during the holy month of Ramadan for Muslims. The culmination of Ramadan is celebrated as Eid. Eid is celebrated with a lot of pomp worldwide. Families and friends come together, gifts are exchanged and there is lot of feasting! One of the main dishes that is cooked to mark the celebration is Sevai Kheer or Sheer Kurma/ Sheer Khorma. The word literally means "Sweetened Milk".


The difference between sevai kheer and sheer khurma is one key ingredient that is dates. When chopped dates is added to Sevai kheer, it becomes Sheer Khorma or Sheer kurma.


Every year, my Bangladeshi neighbor brings me a big bowl of Sheer Kurma on Eid Day. This year, she has gone to Canada to celebrate it with her newly married husband. My kids were missing the Sheer Kurma. I decided to quickly put together a Sevai kheer for them. This one was ready in less than 10 mins !! You have to make it to believe it!


Prep time: 2 minutes
Cook time: 5-7 mins

Total time: 7-9 minutes

Servings: 6-8 people


Ingredients:


Condensed milk: 1 can ( 14 oz)
Whole milk: 2 cups
Roasted Vermicelli : 2 cups
Cardamom powder: 1/8th spoon
Saffron strands: 2-3
Cashew nut bits: 1 tbsp
Slivered almonds: 1 tbsp
Raisins: 1 tbsp
Ghee ( clarified butter): 1 tsp
Salt: a pinch

Method:


Add 1 can condensed milk and 2 cups whole milk to a saucepan/ pot. Bring this mixture to a boil.


Add roasted vermicelli, cardamom powder and saffron strands to the above pot. Mix well.
Turn off the flame. Cover the pot. Keep it covered for 5 mins.


While the vermicelli is being cooked in the hot milk, get the garnishing ready.


Heat ghee ( clarified butter) in a small pan. Add the cashew bits and slivered almonds and sauté for a couple of mins until it just turns golden. Be careful not to burn it.
Now add the raisins to it. Sauté for 10 seconds. Turn off the flame.


Add this to the above pot.

Serve hot or cold!!


Enjoy!! I am bringing this to Throwback Thursday #46, Fiesta Friday #127  and Saucy Saturday #52. Angie's co-hosts this week are Suzanne @ apuginthekitchen and Jess @ Cooking Is My Sport.


Cooking made easy:


If roasted vermicelli is not available in your area, you can roast it yourself in a little bit of clarified butter. You can roast a big batch and store it in an airtight container.

If you don't have vermicelli at all, you can use grated apples or cooked rice.  It will then become apple pudding or rice pudding, respectively!:)


Tip for healthy living:


This Sevai kheer can be made healthier by using regular milk instead of condensed milk. Instead of additional sugar, add chopped dates or maple syrup/ coconut sugar or even honey.

If you want a vegan version, use almond milk instead of regular milk and cooking oil ( preferably coconut)to toast the nuts.

Food for thought:


You are confined only by the walls you build yourself. Unknown


Please do share your thoughts. Your opinion matters!

Friday, July 1, 2016

Poke Cake: American Flag for 4th of July; Vegetarian


It is time to celebrate the American Independence Day guys!! It is the July 4th weekend!! Apart from celebrating the American Independence Day,  it is also the weekend when there will be tons of barbecues all over the country!!


To celebrate this occasion, I decided to make  a poke cake.Yes it is really a cake where you poke tons of holes into the cake! Believe me when I tell you that my kids had fun poking holes into the cake! Finally, there was something that they could do right without me getting mad at them!! I decided that my kids could learn and have fun at the same time. Therefore, I made it as the star spangled banner ( the American Flag)! I made 2 trays: one for my son's school and one for us at home and especially for my dear friend Angie at Fiesta Friday#126! I don't have half the photographic skills that you have Angie, but I sure can vouch for the cake!


Poke cake is super easy! I am going to share with you the healthy vegetarian version of the vanilla cake with the vegetarian jelly. In cooking made easy part of this post, you will also see the quick version which is not vegetarian! Both taste good.


This cake has been inspired by the recipe from  Kraft. For the original recipe, click here.


Servings: 10-12 people


Ingredients:


For the cake:

All purpose flour: 1 and 1/4 cups
Corn flour: 3 tbsp
Baking powder:1 tsp & a pinch
Baking soda: 1/2 tsp
Salt: 1/4 tsp
Granulated sugar: 3/4 cup
Olive oil: 1/2 cup ( any cooking oil can be used)
Greek Yogurt: 1 cup ( regular yogurt can also be used).
Vanilla essence: 1 tsp

For the jelly:
China grass instant pudding mix: 1 packet ( 80 gm)
Water: 250 ml

For the frosting:
Cool whip : 1 container ( you can use whipped cream too).
If you are not vegan, please use a whipped cream frosting, the recipe for which, you can find here.

For garnish:
Blueberries: 24 nos ( may not need all)
Strawberries: 10-12 ( may not need all)


Method:


Preheat the oven to 350 deg F.

Grease a 7x11 inch baking tray and keep ready.

Beat together yogurt and sugar until it is creamy. To this mixture add the oil, vanilla essence and mix well.

Sift together the flour, cornflour, baking powder, baking soda and salt.

Mix the dry ingredients with the wet ingredients. Mix thoroughly using the beater on the lowest setting or using a hand-held whisk. Do not over mix.

Pour the batter into the prepared pan.

Place on the middle rack of the oven and bake at 350deg F for 20-23 minutes or until a toothpick comes out clean when inserted.


Take the pan out and let it cool completely before proceeding to the next step.

While waiting for the cake to bake and cool down, wash the berries and dry them using a paper towel. Cut the leaves of the strawberries and slice them into two halves. Keep aside.

Once the cake is cooled, immediately poke holes into it using a fork.


Prepare the jelly as per the instructions on the package. Do not let it set.

Immediately pour it into the cake so that the jelly is spread evenly all through the cake.


Place the cake pan in the refrigerator for an hour.

After an hour, remove the cake pan out.

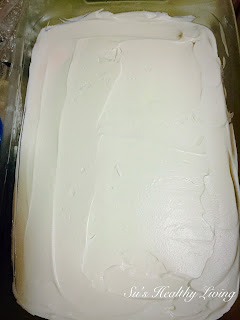
Spread the cool whip on top of the cake evenly until it is a 1-cm thick layer. Place the pan back in the refrigerator for an hour.


Now garnish using fresh berries. I have used blueberries and strawberries and arranged them to look like the Stars and Stripes of the American Flag. You can do it in any way you desire.


Place it back in the refrigerator until ready to serve.


Slice and serve.


Enjoy! I am also sharing this cake at Throwback Thursday#45 and Saucy Saturday#51.


Cooking made easy:


You can use the boxed yellow or white cake mix to make the cake.
Jello can be used if you don't have reservations against gelatin.
Just follow instructions on the package to prepare both the cake and the jelly. Only don't let the jello set. Pour it on the cake before it sets.

You will need longer time in the refrigerator for the jello to set.


Tip for healthy living:


When serving desserts, serve small portions. Desserts are meant to be eaten in small portions. They are not meant to be the main course! Smaller portions means lesser calories! You would have satisfied your sweet tooth without overloading your body with calories!

Food for thought:


Never do something permanently stupid just because you are temporarily upset. Unknown


Please do share your thoughts. Your opinion matters!


Monday, June 27, 2016

Lasuni Chilkewala masoor palak ( garlic flavored orange lentil and spinach stew ) ; Meatless Monday


Last Thursday evening I was running several errands. Well, most evenings I have errands to run, but this particular day was more hectic than the others. The reason for this was that I had to attend the PTA meeting but before an hour before that, I had to meet-up with the out-going treasurer for transfer of information. You see, was kind of cuckolded into the position of treasurer for the PTA. Thursday also happens to be my day for grocery shopping. In midst of all this, I had nothing for dinner. When I say nothing, I mean nothing cooked!! When I got home from worked, I quickly cooked the rice and the lentils in the pressure cooker and then left for the meetings. When I came back home, I was too tired to make anything. I wanted to cook spinach and lentils separately. I decided to make them together. The traditional dal-palak ( lentil-spinach) stew/soup is made using split pigeon peas. I decided to combine whole orange lentil and spinach and make the stew but in a quick fashion. I washed, chopped and cooked the spinach along with one chopped tomato & one onion. I added the cooked lentils to the spinach with some salt and asofoetida. I then tempered this mixture with sautéed garlic, red chilli and garam masala powder. Delicious chili Garlic spinach-lentil stew was ready! My husband went for seconds!!


Sometimes, the best recipes are those that you come up with, either accidentally or when in a hurry! Do give it a try. It is nutritious and delicious!


Prep time: 10 mins

Cook time: 20 mins

Total time: 30 mins


Servings: 2-3


Ingredients
:


Whole orange lentil: 1/2 cup
Water: 1 & 1/2 cups + 1/2 cup
Green chillies: 1,slit( can be adjusted as per individual spice preference)
Spinach: 1 & 1/2cups, chopped
Onion: 1, small, chopped
Tomato: 1 small, chopped
Garlic: 5-6 cloves, chopped fine
Coconut oil: 1 tsp ( any cooking oil can be used).
Red chilli powder: 1/2 tsp ( can be adjusted as per individual spice preference.
Asofoetida: a pinch if using powder, 1/4 tsp if using solution.
Garam masala: 1/4 tsp ( optional)
Salt: as per taste.

Method:


Rinse the whole orange lentil  and add it to a pot with 1 and 1/2 cups water. 
Cook until tender ( around 20 minutes on stove-top, 10 minutes if cooked in pressure cooker). Turn off the flame and keep aside.

Separately cook the spinach with 1/2 cup water, chopped onion, tomato and salt for 6-8 minutes. Turn off the flame. 

Add the cooked lentils and Asofoetida to this and mix well.

In a small frying pan/sauté pan or kadai, heat coconut oil on medium heat. 
Add the chopped garlic cloves. Sauté until garlic is fragrant. 
Add the chilli powder and garam masala powder. Turn off the flame( be careful not to burn the chilli powder)!! 

Add this to the lentils. 

Serve hot with rice/roti/bread. 

Enjoy!! 

I am bringing this comfort dish to Throwback Thursday#45, Fiesta Friday#126  and Saucy Saturdays#51


Cooking made easy:


The cook time can be even lower if you cook the lentils and spinach in the same pot. If using the pressure cooker, you can add to the pot the lentils, spinach, onion and tomato together and cook it.  If using the stove top, you can cook the lentils with the tomatoes and the onions and add the spinach towards the end.

The consistency and taste will vary a little depending on the cooking method selected. If cooked in the pressure cooker, it will be more soupy in consistent while the stove-top will give you a more stew-like consistency.


Tip for healthy living:


Making wholesome soups/stews like this not only makes dinner easy but also provides for a complete meal!

Food for thought:

Don't give up what you want most, for what you want now. Unknown.


Please do share your thoughts. Your opinion matters!


Monday, June 20, 2016

Virgin Peach Melon Daiquiri ;Meatless Monday


With the soaring temperatures, our urge to constantly  find ways to cool down increases!! The most common method to cool down is to drink something cold.  This often makes us gravitate towards unhealthy drink options like  store-made/ bought Smoothies, Coolattas etc which pack a ton of sugar! These drinks can be made at home within 5 minutes if you have the ingredients at home! If you don't have all the ingredients, you become creative and make use of what you have!  All you need is a blender of some kind; nothing fancy.


Summer is a season of watermelons and peaches!! We often buy whole watermelons and then that watermelon occupies a lion's share of space in the refrigerator! I have found that using it in a juice-drink is the quickest way to finish it off! At the farmer's market I get carried away and often buy more peaches than what I can eat! Yesterday evening once we got home after a walk at the park, I decided to use these two fruits and make a drink. I just blended some watermelon and a peach with some cubes of ice and voila! A perfect drink was ready! The hubby and the kids drank it even faster than I made it!! Both the watermelon & peach were sweet, so I didn't have to add any additional sugar. It was truly delicious and refreshing! Added bonus: the kids go their daily quota of fruits without even realizing it! How cool is that!


Prep time: 3 minutes

Total time: 3 minutes


Servings: Two 8 oz glasses


Ingredients:


Watermelon: 1 palm-size slice ( roughly 1 1/2 cups diced cubes )
Peach: 1 medium-sized ( around 1/2 cup of diced cubes ).
Ice-cubes: 4 nos
Sugar/honey: 1 tsp ( optional)


Method:


Peel the watermelon and dice it small. Keep aside.

Wash and peel the peach. Slice it. Remove the seed.

Reserve two small pieces and add the rest of the  watermelon cubes with the  peach slices & ice cubes to the blender . Add sugar if the fruit is not sweet. Blend for 30-45 seconds.

Divide the juice between two tall glasses.

Garnish with reserved watermelon cube.

Serve immediately/ serve cold.

Enjoy!!

I am bringing thirst quencher to all our friends at Throwback Thursday#44, Fiesta Friday#125  and Saucy Saturdays#50! Angie's co-hosts this week are  Quinn @ dadwhats4dinner and Elaine @ Foodbod.

Cooking made easy:


You can make a drink with fruits of your choice and availability. If the pulp is thick, add additional water. If the fruit is sour, sweeten it a little with honey or sugar. Play around and find out which combination works out the best for you!


Tip for healthy living:


Whenever you buy fruits or vegetables, it is best to buy whatever is in season. The produce that is in season is usually locally grown which in turn means that it has not travelled far and therefore is fresh.


Food for thought:


Every day may not be good.. But there is something good in every day! Unknown

Please do share your thoughts. Your opinion matters!


Friday, June 17, 2016

Ripe Mango Gojju by Jayashree T. Rao; Guest Post Series


I am sure all of you relished Anjana Devasahayam 's Zucchini Hakka Noodles! I know I did! I made them rice  noodles for dinner and my family just polished it! If you missed it last week, feel free to go back and check it out! You will find a picture of my version too! 


This week I have a guest blogger from my part of India, Jayashree T.Rao. She  is a friendly and enthusiastic freelancer blogger who  writes her cooking tales on EvergreenDishes. It is primarily a vegetarian blog with predominantly Indian recipes. Besides writing recipes, she also writes poems and articles. She believes in living life to the fullest and loves cooking for husband and teenage children. Her other interests are reading and gardening. She is a published writer who is sharing with us today, one of her favorite poems.


INSPIRATIONS FROM NATURE

Nature is at its best,
Everything is beautiful
So blissful and delightful
Is it the mountains or river streams?
Flora or fauna, innumerable
That’s takes us out of this world
To a new exotic world.
It’s wonderful to see a seed
Sprout to a root and shoot,
Grows into a tree
The beautiful butterfly
Comes from a wiggly caterpillar
And the glowworm
Shining at night.

Strange are the ways
Of wild animals
They take more care
Of their young ones
Be it the mighty tiger,
Pouched Kangaroo or the
Mongoose from the snake.


She has brought us the recipe for Ripe Mango Gujju. It seems like a super easy & super delicious recipe, just the way I like it! I have a mango waiting for me at home to try this recipe with! Do check out all her other recipes at EvergreenDishes! She is giving away a book of handy hints to subscribers to her blog. It consists of hundred useful tips.


   Ripe Mango Gojju

Hello all,
    At the outset, I want to thank  Suchitra for inviting me to write a guest post on her blog. Blogging has introduced me to many people across the globe and she is one of them. Birds of the same feather flock together, goes the saying.  Quite true in our case,  foodies  exchanged comments and very soon we were friends.
         As the season of mangoes is coming to an end, I thought I will put a dish of the same. Again, till the next year, we will have to wait for this wonderful fruit.
          Mango gujju is a tasty and popular accompaniment made in Karnataka. It is sweet,tangy and spicy, all combined into one usually served with rice.  It can also be served with chapatti or dosa.
          Usually the small fibrous mango with sour taste are used. But I have used the regular mangoes which I had and thus added a little tamarind pulp. It  was ,delicious and liked by all. Over to the recipe now.


INGREDIENTS :

·         Mango 3
·         Tamarind pulp 2 tbsp
·         Jaggery 1tbsp
·         Green chilly 4
·         Salt to taste
For the seasoning :
·         Oil 1tbsp
·         Mustard seeds ½ tsp
·         Asafoetida a pinch
·         Urad dal ½  tsp
·         Curry leaves a few
·         Red chilly 1

Method :

1.       Wash the mangoes. Remove the stalk  and make small incisions with a knife at the tip.
2.       Put them to boil with three cups of water.
3.       The colour of the skin should change. This takes approximately ten minutes.
4.       Let cool.
5.       Remove the skin and leave it in the water.
6.       Put the pulp with the seed in another bowl.
7.       Squeeze the pulp.
8.       Extract the pulp from the skin and throw the skin away.
9.       Mix both the pulp together. It should be of medium consistency.
10.   Grind the chillies  and put in it.
11.   Put jaggery and salt to it. Mix altogether.
12.   Make seasoning in a small pan. Heat the oil and put the mustard seeds, as it crackles, add urad dal, red chilli, turmeric powder, asafoetida and curry leaves.
13.   Pour the seasoning over the prepared gojju and keep covered for fifteen minutes.
14.   Tasty mango gojju is ready to serve.


Take a tip:

·         If the mangoes are sour, there is no need of tamarind pulp. Add only jiggery,salt and chilly.
·         The quantity of jiggery differs accordingly. If the mangoes are sour, you will need more. If they are sweet, you will need less.
·         The taste of gojju  should be sweet, tangy and spicy.
·         Do not discard the seeds. They can be immersed in it and licked while eating.


Enjoy!


I am bringing Jayashree's delicious  to all our friends at Throwback Thursday#43, Fiesta Friday#124  and Saucy Saturdays#49! Angie's co-hosts this week are  Lindy @ Love in the Kitchen and Liz @ spades, spatulas & spoons.

If you are interested in writing a guest post for my blog, please email me at Sushealthyliving@gmail.com for more details.


Please do share your thoughts. Your opinion matters!