Friday, November 7, 2014

Chocolate Orange Marble Bundt Cake


My husband's birthday was last week. It was mid-week and since it was a weekday, I was not sure what I was going to make. Of course, one can say that I should have made the cake well ahead of time... But time is a precious commodity for me!! I wish I had 48 hours in a day than just 24! Then I would be able to do everything that I want to do!! Oh yes, with the extra-hours, I need extra energy too.. Of late I have been finding myself less energetic!! Am I growing old??? Work is busy, life is busy.. but that is no reason for me to be tired right?? The reason I am bringing up the topic of my fatigue is because that is the reason why I didn't get a chance to make a cake ahead of time! Of course, in my head I have made several cakes for the past couple of weeks, but when it came to actually making them, I kept putting off for the next day, until his birthday just dawned on me! But, you see I had already bought a cheesecake over the weekend and decorated it as a back-up, just in case I didn't get a chance to bake a cake! Why a cheesecake?? Because my husband loves cheesecake and in case he didn't like my healthy cake!


Well, you see in my mind, I kind of had an idea as to what I want to make: something healthy( read not too sweet) and  something easy to make that doesn't take too much time. I have had this nice Stained glass Bundt cake pan since the Spring!


A close friend of mine had presented it to me for my birthday! It is such a beauty! I have been meaning to bake a cake in it since the Spring!


Isn't she pretty??
I also have been dying to try the new fad that is going around: the naked cake! After thinking about it, I remembered a recipe posted by Sumod Tom a long time ago about a chocolate Bundt cake on a food group called CAL and a recipe for spiced honey orange cake by my dear blogger friend Selma Jeevanji at Fiesta Friday! I did not want to use that much honey! My final product was a combination of  both recipes.


The cake was not only gorgeous to look at, but tasted delicious too! It is pretty simple and quite easy to make!

Servings: 10-12


Ingredients:


All purpose flour: 2 cups
Baking powder: 3/4 tsp
Baking soda: 3/4 tsp
Salt: pinch
Cocoa powder: 1/4 cup
Milk: 1/4 cup
Brown sugar: 1 cup
Butter: 1 cup ( 2 sticks)
Eggs: 5 large
Orange juice: 1/4 cup
Orange zest: 2 tbsp ( from 1 medium orange)
Raisins: 1/2 cup
Vanilla essence: 1 tsp

To decorate:
Powdered  sugar: 2 tbsp
Raspberries: 2 cups
Royal icing flowers: 6-8( you could use fresh flowers).


Method:


Preheat the oven to 350 degree F.

Grease the Bundt cake pan and keep ready.


Seive together flour, baking soda, baking powder and salt and keep aside. You could also just whisk it using a whisk. Whisk thoroughly.


Mix the cocoa powder in milk and keep aside.

In a bowl, using an electric mixer, cream together the butter, brown sugar and vanilla essence. Add eggs one by one, beating after the addition of each egg until fluffy.


Now fold in the flour mixture little by little until it is all incorporated. Do not overmix!


Divide the batter into two equal portions.


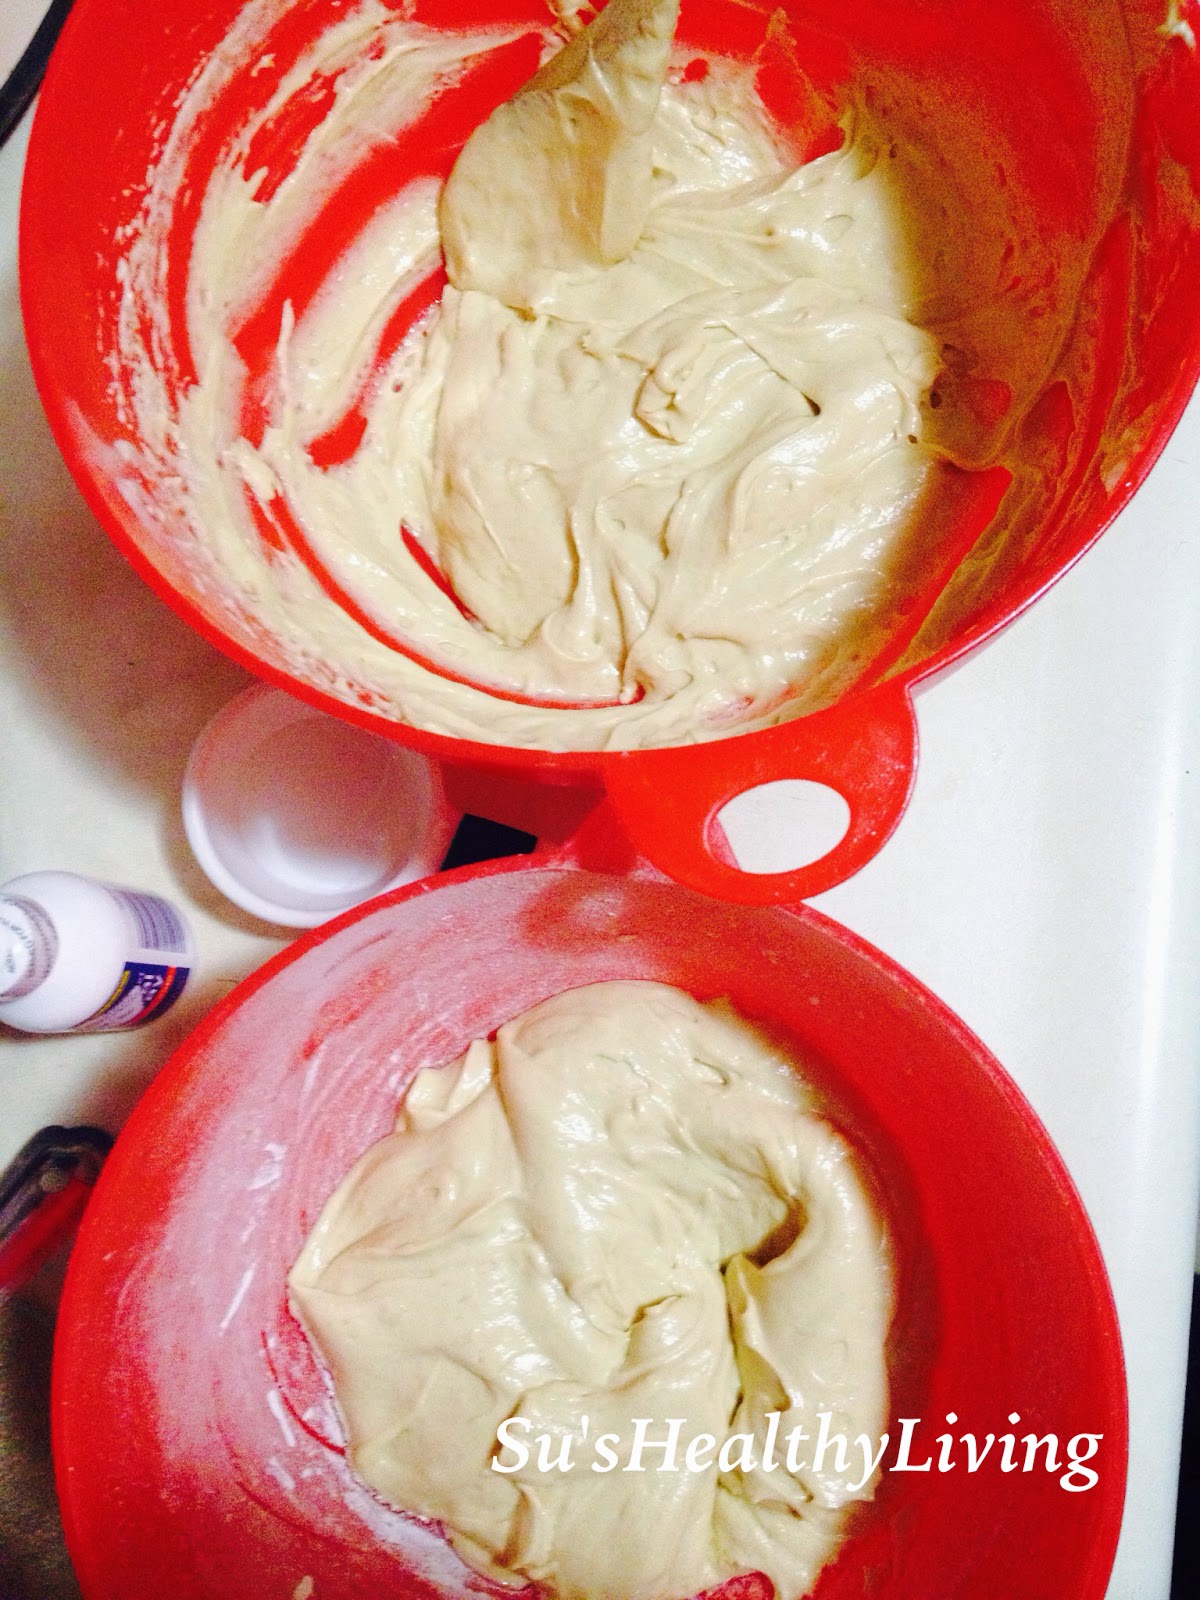
To the first half add the milk and cocoa mixture and mix well. Again, do not overmix! If the batter is too thick, add a tbsp of milk.


To the other bowl,  add the orange juice, orange zest and raisins. Mix gently but thoroughly. Do not over mix!

Now pour the batter into the Bundt  pan little at a time alternating between the chocolate and the orange flavored ones.


 Start and end with the chocolate batter.


Tap the Bundt pan against the kitchen countertop to get rid of any air bubbles.

Place it in the center rack of the oven and bake for 40-45 minutes it until a skewer comes out clean.
My oven took 40 minutes. Keep checking after 35 minutes and adjust the time accordingly.


When done, take the pan out and let it cool down for atleast 30 minutes before taking it out of the pan and place it on the wire-rack.


Let it cool completely before decorating it.


To decorate the cake, sprinkle powdered sugar on the cake using a sieve. Decorate with flowers ( fresh or edible ) and berries of your choice. I used raspberries and royal icing flowers.


It was a superhit! I was happy with the end product and so was my husband and  the kids!


Enjoy a slice with a cup of tea or coffee! 


I am bringing this cake to my friends at Fiesta Friday! If you did not get a chance to visit the awesome Hyderabadi Dum Chicken Biryani  posted earlier during the week, it is worth visiting!

Cooking made easy:


While making a cake, make sure that you have all your ingredients in front of you and preferably they are all at room temperature. This will get you good results.

Sieving or whisking the dry ingredients thoroughly helps the ingredients mix well and also makes the cake fluffier.

Tip for healthy living:


Eating small frequent meals is better than eating large infrequent meals. This not only  keeps the blood sugar levels steady, also helps us feel more energetic, and prevents us from binge eating! Ideal recommendation is 3 medium-sized meals with 2 snacks. Snack on fruits.

Food for thought:


Beware the barrenness of a busy life. Socrates

Thursday, November 6, 2014

Tori ani kooka Ghashi ( pigeon peas cooked with Chinese potato in a coconut-based sauce).


Growing up I just loved beans. Any kind of dried beans would appeal to me! It could be made with coconut-based sauce and with some vegetable called "ghashi" or it could be made soup-style called "saaru-upkari". Sometimes it is made like a stir-fry called "Ussli". I loved them all.. I still like them but I don't make it as often for beans causes bloating in me.:( Funny I cannot remember that happening as a child!!! So now I ration myself to may be once or twice a week and that too small portions! Today I am going to share with you tori Ani kook ghalnu ghashi which means pigeon peas cooked with Chinese potato in a coconut-based sauce. This dish is simple, easy to make and does not have garlic or onion in it. This makes it perfect to be one of the dishes cooked during festivals and auspicious days when only dishes without onion and garlic can be made.


Servings: 4-6


Ingredients:


Dry tori ( pigeon peas): 1 cup
Peeled and Chopped kook ( Chinese potato): 1 cup

For grinding: ( for masolu):

Freshly grated coconut: 1 cup
Red chillies( dry): 3-4( depending on the spice level of the chilli used).
Tamarind: marble sized

For the tempering:
Coconut oil: 1 tsp
Mustard seeds: 1/2 tsp
Curry leaves: 1 small sprig

Method:


Soak the tori ( pigeon peas) for 8 hours or overnight. Add 3 cups of water and cook it in a pressure cooker for 20 minutes on low flame after the first whistle. Turn off the flame. Do not open until the pressure in the cooker has completely ceased.  Keep aside.

Cook the kook ( Chinese Potato) with one cup water and pinch of salt until tender. Keep aside.

Using a blender,grind together all the ingredients listed under "for grinding" into a smooth paste, adding water as needed.

Take a pot big enough to hold the pigeon peas and Chinese potato. Add both of them to the pot. Keep aside any excess water.

Add the ground paste to the pot and bring it to a boil on low flame. Add the reserved water as per the thickness of the gravy desired by you.

Tempering:
Heat oil in a small frying pan. Add the mustard seeds. When they crackle, add the curry leaves and switch off the flame. Add this to the above pot!


Serve hot with steamed rice  or flat bread.

Enjoy!

Cooking made easy:


This dish can be made with Chana ( chick peas) too and is known as Chana ghashi. It is a speciality of GSB community.

Yam ( suran), regular potato, chayote, cauliflower, tender bamboo shoot, gherkin can all be used as a mix instead of chinese potato for the above dish.


Tip for healthy living:


Using very hot water for bathing can result in drying of the skin. It is best to bathe in lukewarm water. If that is not possible at

least make sure that the last couple of minutes of the bath/ shower is in lukewarm water. This tremendously improves the skin quality.

Food for thought:


Love conquers all. Virgil

Tuesday, November 4, 2014

Oven Grilled Asparagus


Once the weather turns chilly, I find all kinds of reasons to turn on my oven. I love broiled/baked/grilled food. It is healthy and switching on my oven warms up the house! Asparagus is one of my all-time favorite vegetable. I love it cooked any which way! One of my favorites however, is the very easy oven-grilled asparagus. It is fast, convenient and tasty!

Servings: 4-5


Ingredients:


Asparagus: 1 bunch
Olive oil: 1 tbsp
Garlic:2-3 cloves, minced.
Sea salt: as per taste
Black pepper: 1/2 tsp , freshly ground. ( you could reduce the amount as per taste)
Lemon juice: 1 tbsp

Method:


Preheat the oven to 400 deg F.

Line a baking sheet with parchment paper or foil. Keep aside.
Wash and clean the asparagus thoroughly. Pat it dry. Break off the woody stems with your hands.

Arrange the asparagus on the baking sheet in a single layer.
Drizzle olive oil on it. Sprinkle the minced garlic, salt and pepper.


Bake it in the oven for 8 minutes making sure the tips face the front of the oven.


When done, squeeze lime juice on it and serve warm.


Serve it as a side or serve it alone!


Enjoy!

I am bringing this to Super Simple Tuesdays, by Hun, what's for dinner.

Cooking made easy:


The above dish can also be made on stove top in a sauté pan. Add olive oil, heat it, add the asparagus, cook it on high flame for 2 mins, then lower the flame to the lowest, cover and cook for 8 mins. All done! Asparagus when done should be nice, firm and crisp. It should not be overcooked where it is all shrivelled up!


Tip for healthy living:


Asparagus is a superfood with tremendous health benefits. It is supposed to be especially beneficial for patients with arthritis and is purported to relieve joint pain. The only down side with eating asparagus is the smelly urine the next day! 

Food for thought:


Good advice is always certain to be ignored, but that's no reason not to give it. Agatha Christie

Sunday, November 2, 2014

Hyderabadi Dum Chicken Biryani


It was my husband's birthday this past week. Being that it was a week-day, I didn't make anything elaborate.I made his favorite Hyderabadi dum chicken biryani this weekend!


By any account, Hyderabadi Dum Biryani is the king of all kinds of biryanis! Whoa!! What am I talking about?? Does this sound like jargon?? Okay, let me start at the very beginning, so that I can make this comprehensible to all readers! Biryani is a way of cooking rice with spices and some kind of meat.. Lamb, mutton, chicken. It can also be made using fish or eggs.. There is of course a vegetarian version too.. But that is pretty much like the pulao( pilaf). Now what is the difference between pulao and biryani?? Yes, both are dishes which contain rice mixed with chicken/fish/vegetables. The difference is that in pulao, the rice and the meat/fish/vegetable is cooked together. Whereas in biryani, the rice is pre-cooked until half-done, then layered with meat/chicken/fish which has also been separately cooked until half-done and then the two are arranged in alternate layers; cooked under dum and garnished with fried onions and cashew halves on top. What is dum? Dum is pretty much slow cooking either in the oven or on the stove-top on top of a cast iron pan, without bringing the pot in direct contact with the fire.


Mmmm... My mouth is watering already. Biryani is one of the top dishes offered in India. It is generally made on special celebratory occasions. There are several kinds of Biryani.. Bombay Biryani, Hyderabadi biryani, so on and so forth.. Hyderabadi Biryani is considered top notch and the best tasting.. Hyderabad is the capital of the state of Andhra Pradesh in India.  This biryani apparently originated in the royal kitchen of the Nizam Shahs  who ruled the region at the time.


Every Indian who likes Biryani prides themselves on making a good one. I have come across several recipes out there that are either too tedious with hundreds of steps to it or it just didn't taste right. Me being me.. I have neither the time nor the patience for long-drawn recipes that take all day to make. Therefore I was thrilled when my dear friend Phani( who is from Andhra Pradesh) shared this quick and easy recipe for Hyderabadi Dum Biryani. I have been making this for a few years now and I must say, it is absolutely fool-proof! I am yet to find a person who didn't like this Biryani! The addition of boiled egg halves before serving is not part of the original recipe.It is my modification as sometimes the Biryani is too spicy for me and this helps cut the spice level.


Whenever I make this Biryani, I make a huge batch in my Dutch oven as my husband looks forward to leftovers. I must say that this is the only non-vegetarian dish whose leftovers he eats!!! I think he secretly looks forward to every time I make this dish!;)

Servings: 6-8


Ingredients:


Basmati rice: 3 cups
Water : 8 cups
Chicken with bones : 2 lbs, cleaned, chopped into medium pieces.
Red Onions: 3 medium, chopped lengthwise.
Cashew halves: 2 tbsp
Sour yogurt: 1 cup
Ginger garlic paste: 1 tbsp
Lemon juice: 1 tsp
Haldi: 1 tsp
Chilli powder: 1/2 tsp
Green chillies: 6, chopped fine.
Bay leaves: 2
Cloves:4-6
Cardamom pods: 4-6
Cinnamon stick: 2 nos
Shah jeera: 2 pods
Kalajeera: 1 tsp
Ghee: 2 tbsp ( optional)( you could use just oil instead of ghee)
Coconut oil: 2 tbsp( any cooking oil can be used)
Mint leaves: 1 cup, cleaned
Saffron:3-4 strands
Warm milk: 1 tbsp
Hard boiled eggs: 4, sliced into 2( optional), for garnishing.
Salt: as per taste.


Method:


Marinate the chicken pieces with a little salt, lemon juice, haldi powder, red Chilli powder and keep aside for atleast 30 mins.

Fry sliced onions in ghee-oil mixture until golden and crispy . Drain on paper towels.

Fry cashew halves in the same oil and keep aside.

Now sauté cinnamon, clove, cardamom, bay leaves, kala jeera, shahi jeera in the same oil for 1-2 mins and keep aside.

Soak basmati rice in water for 30 minutes. Drain and let it dry for another 30 mins.


Boil water with 1/2 tsp salt . When the water comes to a boil, add the basmati rice. Cook it only until the rice crackles( half-done, takes around 10 minutes). Drain using a colander. Keep aside.


Cook the chicken until half-cooked. Let it cool down.


Once cooled, add to it ginger garlic paste, yogurt, salt, the fried whole spices, half of the fried onions and cashew halves, green chillies, mint leaves. Mix well.


Soak the saffron strands in warm milk for 10 mins. Mix this into the warm rice.

Preheat the oven to 400 deg F.

Take the chicken in a oven-safe pot( I use a Dutch oven). Spread it along the entire bottom of the pot. 


Now layer the half-cooked rice on top of this.


Cover the pot tightly with aluminum foil.


Close the lid and place it in the oven for 45minutes to 1 hour, checking in between.


When done, garnish with the removing fried onions/ cashew halves and boiled egg halves.


Mix well before serving.


Serve hot with onion raita and/or chopped onions dressed with lemon juice and salt.


Enjoy!

I am bringing this to Angie's Fiesta Friday! I know it is a little late in the day to bring it but I am sure the wonder ful and Angie and her co-hosts Jhuls and Margy wouldn't mind and would not want to miss out on this delicious dish!
I am also bringing this to Super simple Tuesdays by Hun whats for dinner?.

Cooking made easy:


If you don't have an oven, you could still make Dum Biryani by heating a cast iron frying pan/griddle on low flame and keeping the pot on top of the pan.

There is an even easier way, but if course is not the authentic Dum Biryani. This is by layering it in the rice cooker and letting it cook there. Though I have never personally used this method, I have seen my friend do it. It comes out perfect!

Tip for healthy living:


For those who are health conscious, most recipes that call for ghee can be substituted with a 50:50 ghee:oil mixture. This way you can enjoy the flavor and aroma of ghee too while being low in calories/fat content.

Food for thought:


The future of the distant and the difficult is deceptive.The great opportunity is where you are.John Burroughs

Friday, October 31, 2014

Tawa Bhendi Fry ( Pan-fried okra)


Couple of weeks ago, I had the previlege of writing a guest post for Jhuls from the wonderful blog the not so creative cook. The title of her blog is a misnomer as she is an extremely creative cook with a great bubbly personality. She is so full of life and her blog has very nice recipes! She is my friend from the blogging world. I met her at Angie's Fiesta Friday.


 When Jhuls invited fellow bloggers for guest posts, I jumped at the chance. I was honored when she accepted my post and later featured it in her blog.This recipe is a super-easy, quick and delicious one! To get the recipe for Tawa Bhendi Fry recipe, please visit  the not co creative cook. I promise you that you will come with many more other recipes!


Halloween special: Messy sausage mummy!


I didn't know what Halloween was until I came to this country! I used to read about it in books and wonder what kind of celebration/ festival is this?? Well, I still don't know! Why is Halloween celebrated?? Do you know?? Hence, it is hard for me to generate the required enthusiasm for this particular celebration. Why? I don't see a point to it! But I do do a little something because of the kids! I am the kind who runs around the last minute! Then again, I have no Halloween party to go to, my daughter's school doesn't allow them to come to school in their costume and my son is too little to know anything!! Ok, ok, I am not a party spoiler! That is why I dressed my daughter in her favorite Princess Aurora costume and my son as his favorite character Winnie the Pooh! Awww.. They looked so adorable & soo happy! That is why I even came up with a Halloween- themed snack! Sausage mummies!! I came across this by chance at work on tv!! I liked the idea of it and decided to make them! It looked super-easy to make! You can find the original recipe here. But by the time I made it ( after trick-a-treating and in between laundry), it seemed like a Herculean task! I just didn't have the patience to make long ropes and patiently wrap it up! I was wayyyy too tired. I just wrapped them and baked them! That is why I named them messy mummy! Someday, when I have patience I will make it again and post better pictures!.


Here is the step-by-step of my version of the recipe!

I am bringing these messy mummies to Angie's Fiesta Friday! I am so excited to share the concept of it with all my friends there! Happy Fiesta Friday and Happy Halloween everyone! This week Jhuls and Margy are co-hosting.

Servings: 5 ( two per person)( nobody can eat just one!


Ingredients:


Turkey sausages: 1  package of 10 sausages.( any sausage can be used; we don't eat meat, hence turkey)
Pillsbury biscuit: 1 package ( makes 10 biscuits)
Mustard : as needed to make eyes.

Method:


Take a single sausage . At the junction of the upper 1/3 and lower 2/3 cut the sides of the sausage to make arms, as shown in the picture.


No make a slit in the bottom of the sausage to make legs. Leave the upper 1/3 for the head.


Take a single biscuit dough and divide it into three parts; two big equal ones for the arms and the legs and the small one for the head.


Roll the pieces into 2 long ropes and one short rope.

Using the small one, wrap the head portion of the mummy. Using one of the larger ropes, wrap one arm and leg on one side, starting from the leg working your way up. Now do the other arm and leg starting from the bottom, making the shoulder and then working your way down the arm.


Line up the mummies on a baking sheet in a single layer.

Preheat the oven to 375 degrees F.

Bake the mummies for 10-12 minutes or until they are golden brown.


Take them out and let them cool down slightly. Once cooled, make the eyes and mouth using the mustard.

Serve with ketchup or your favorite dip!


Enjoy!

Cooking made easy:


Clean-up after baking becomes a chore especially when there is drippings or the pans are burnt. You can prevent this headache by lining your baking pans/ sheets with aluminum foil. When done, all you have to do is take the foil out, gently wash the pans, dry and put them away! You can even use the foil to wrap leftover baked goodies!

Tip for healthy living:


Truthfully, even though, sausage tastes great on the tongue, I know it is not healthy. It is not good for you. You really don't know what is in a sausage!Most often, sausage is made from the scraps of leftover meat! It is also high in nitrites and sodium which is bad for the body!

Food for thought:


Good advice is always certain to be ignored, but that's no reason not to give it. Agatha Christie