Off late I have been rather low on energy... I get tired rather easily. I am sure those who know me or have been following my blog would have noticed that I don't post that often now and I am also not that active on social media. I have just enough energy to get through my 2 jobs, cooking and the other everyday household chores.

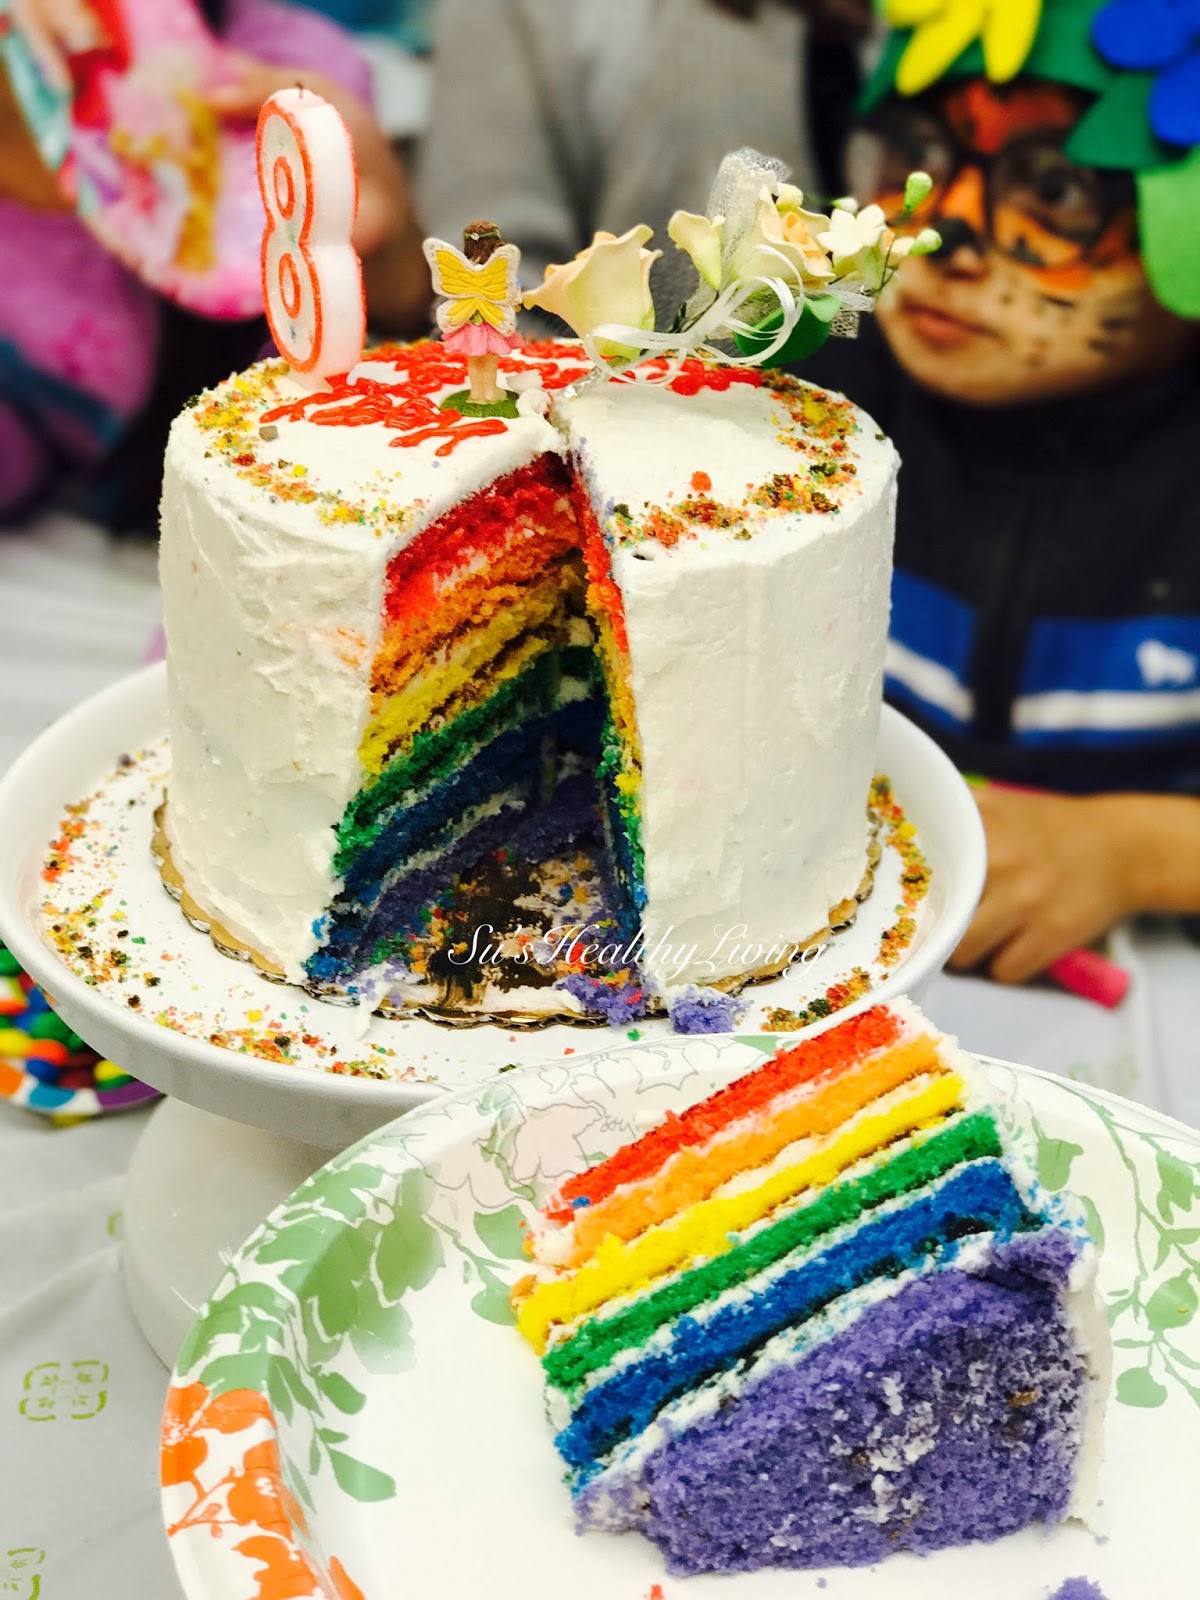
So why I am I telling you all this?? To give you testimony of what a child can make a mother do!! This is the first year that I didn't have my daughter's birthday celebration at home. I had it at Michaels with very few of her school friends. This way I didn't have to cook much or worry about cleaning the house! I ordered Pizza from Papa John's & made a nice chickpeas salad. I had some chips, grapes for the kids to munch on. I was going to order cake from Costco, but my daughter requested for a " mommy" cake as every year. She wanted something with a fairy on top! I relented and decided to make an enchanted fairy garden cake. But what about the inside of the cake?? I decided that I will try my hand at the Rainbow cake! After all there has to be something beautiful when it comes to fairies!

In the past, I have quite a few times used boxed mixes when I have made 3-D cakes like the Tinkerbell cake, the Elsa cake, the McQueen car cake. With all the food I was cooking, I didn't need the additional hassle about worrying about the texture of the cake. This year, since I was not cooking any food, I decided to make the cake from scratch. I looked for the perfect vanilla cake recipe that I could rely on. I found it here. I modified the recipe to suit my needs by doubling it and using cooking oil instead of shortening. I also used a mix of sour cream & yogurt instead of buttermilk. I also reduced the sugar. I used this rainbow cake recipe as a guide. Again, I modified the recipe to suit my needs by virtue of the recipe itself & the amount used. I baked using four 9 inch pans ( which was how many pans I had) and had to adapt the recipe accordingly.
So how is this cake healthy?? All the ingredients are fresh, no shortening has been used. I have ensured that the cake is not too sweet. I have also tried to use minimal food coloring. You can make it completely using natural food colors. You can check they recipe here. The buttercream layers are thin between the cake layers, as is the outer layer.

Overall, while this cake is easy to make if you have 6 pans, it requires some patience if you are using only 2 or 3 as you have to bake the cake in batches and wait for the cake to cool down to remove it out of the pans and bake the next batch! I also had difficulty with my mixing bowl as it wasn't big enough therefore there wasn't enough room for the batter to be mixed !! If I were to make it again, I would make the batter in 2 batches.
The assembling itself is not hard. You just have to ensure that all the layers are the same thickness. A cake leveler is very handy for this.
Frosting: I made a double the batch of my favorite buttercream frosting. You can check the recipe here. It was just enough for layering and icing the cake! Mind you, I used a thin layer of frosting.

Let's now go ahead and check the recipe in it's entirety. The ingredients can be divided into half to make 2 batches of the cake batter.

Servings: 12-14
Ingredients:
For the cake:
Butter: 2 cups ( 4 sticks), softened
Coconut oil: 1 cup ( any cooking oil can be used).
Sugar: 5 cups
Eggs: 10 large, room temperature
Vanilla essence: 3 tsp
All purpose flour: 6 cups
Baking powder: 4 tsp
Salt: 1/2 tsp
Whole milk: 1 cup
Yogurt: 1/2 cup
Sour cream: 1/2 cup ( you can use 1 cup sour cream if you don't have sour cream).
Food coloring: gel colors in 6 colors: violet, blue,green, yellow, orange & red.
Method:
Preheat the oven to 350 deg F.
Prepare six 9-inch round cake pans by greasing it with butter and dusting it with flour or by just using a non-stick spray.
Line the bottom of each cake pan with parchment paper circle.
Take 6 bowls: add 2 tbsp milk to each bowl and add one each of the six colors, mix and keep ready.

Mix together the remaining milk with the yogurt,sour cream and vanilla essence. Keep aside.
Cream together butter & oil until light and fluffy, around 3-4 mins. Do not rush this step! It is very important. Add sugar one cup at a time, making sure to mix it after each addition.
Add one egg at a time, beating it until fluffy after the addition of each egg!
Sift together flour, sugar and baking powder.
Fold the flour mixture into the butter-egg mixture, alternating it with the milk mixture. Start and end with the dry ingredients. Make sure not to vigorously mix it. Just gently and thoroughly.

Add 1.5 cups of batter to each of the prepared bowls with color. Gently mix it so that the batter is evenly colored.

Pour the batter into the prepared cake pans. By the end you should have 6 cake pans with 6 different color batter in each. If you have less number of pans, bake just that many colors and wait for those to be baked and cooled and removed out of the pans to bake the next batch.
Place the pans on the middle 2 racks.
Bake for 25-30 mins or until a toothpick comes out clean. Rotate the pans halfway through the baking them. After 25 mins, I like to check every 2-3 mins to check if the cake it done.
Take the pans out and let the cakes cool down ( atleast 30 mins) before taking them out of the pan.
To level the cakes, wait for it to cool down completely ( atleast another 30 mins).

This cake tends to crust due to the sugar & egg in it. Don't be alarmed. You will be cutting off the crusty tops while leveling the cake. I like to use my cake leveler to level the cake as I can mark the height on the leveler and this way I can ensure that all the cake layers have the same thickness.


Level off all the 6 cakes and keep aside.

Now take a cake board that is 1 inch less in diameter. Keep it on top of the leveled cake and trim the crusty edge of the cake. You can use any object that is a circle and slightly smaller than the cake. I used a stainless steel plate. Do this with all the 6 cakes.
Now it is time to layer the cake!!
Take a cake board. I have used a 9 inch cake board.
Place a small dollop of frosting in the center of the cake board.
Place the purple cake layer on top of it.

Now spread the frosting on top of the cake in an even fashion so that it is 1 cm thick. I used a piping bag to do this.
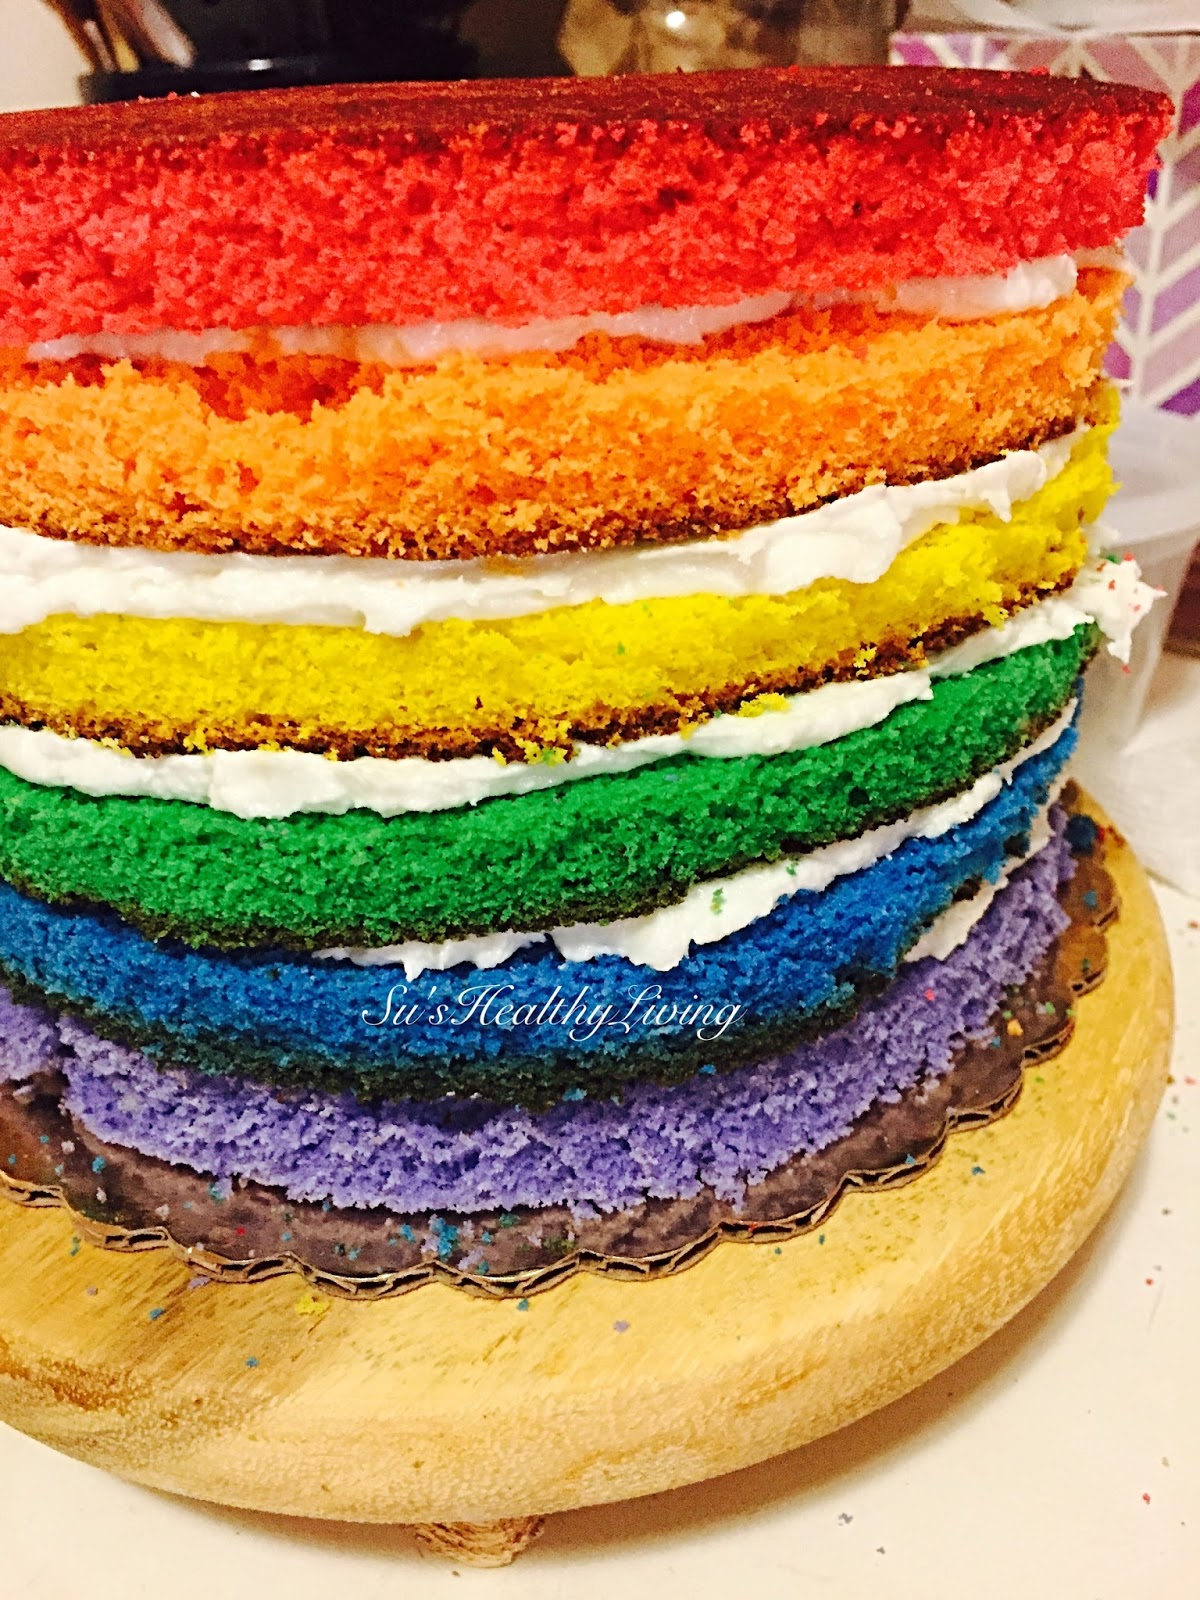
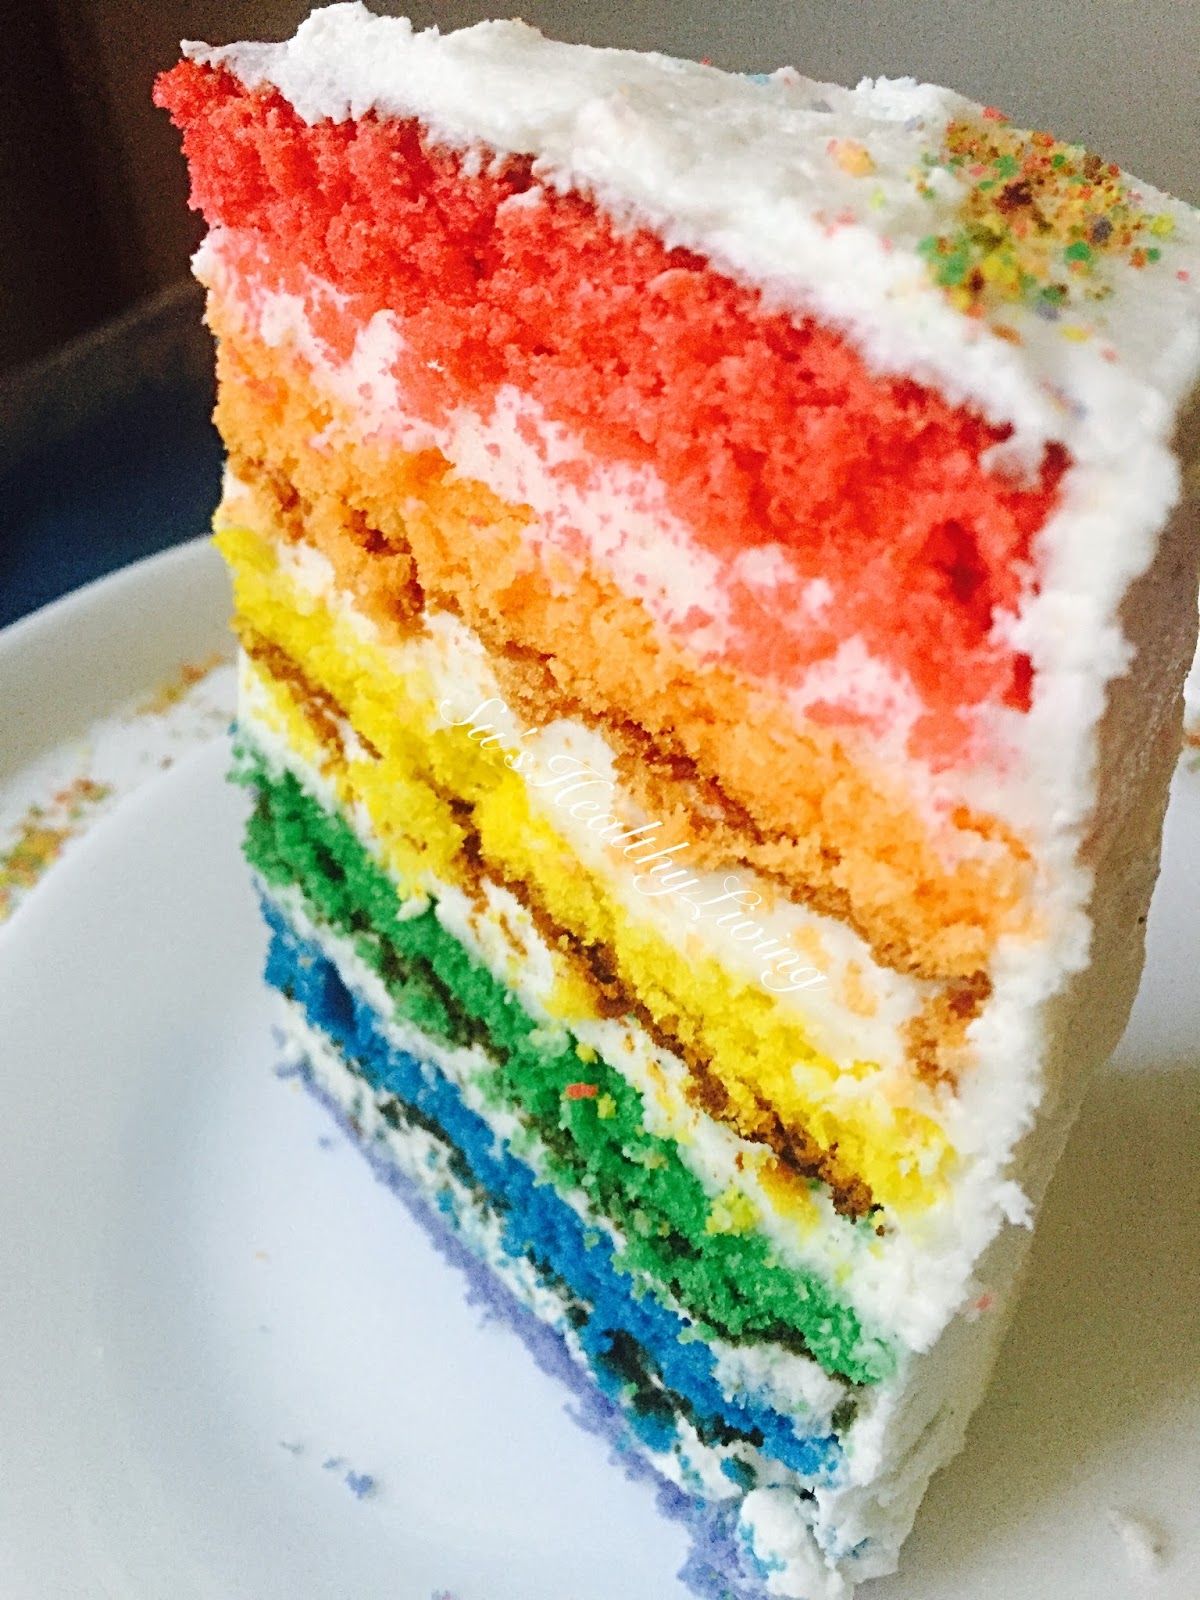
Now arrange the other layers in the same fashion in this order: blue, green, yellow, orange and red.
Once the top layer has been placed, Stick a thick straw in the center of the cake. I did this so that the layers don't shift during transportation.

Now do a crumb coating to the entire cake. Crumb coating is applying a thin layer of frosting to the entire cake. This seals in the crumbs and makes it easy to ice the cake.

Place the cake in the refrigerator for atleast 30 mins.

After 30 mins, remove the cake out and frost it any way you desire! I applied another thin coating of frosting as I didn't want the cake to be too sweet.
I decorated the cake once I reached Michaels as I didn't want the cake to be messed up during transportation.
Decorating the cake:
Crumble some of the crust from the cake that was cut of earlier. Mix different colors. Sprinkle it along the diameter of the top of the cake.
I sprinkled some around the base too once it was placed on the stand.

I used edible flowers made from royal icing to make my enchanted garden at the top. I used a fairy from the enchanted planted garden that I had and and an angel from Michaels as cake toppers.

This cake can be sliced thinly as it is quite tall.
My daughter and everyone who came for the party loved the cake. I hope you do too!!
Enjoy!!
I am going to share this birthday cake with all my friends at Angie's Fiesta Friday! Angie, I know I have not been a frequent visitor this year at your parties, but I am sure you understand. I shall try to stop by more often now.

Cooking made easy:
When you make an elaborate cake such as the one above, it helps if you give yourself extra time to get everything done, especially if you have to bake the cake in batches.
Also, buttercream frosting can be made a week or 2 early and kept in the refrigerator. Just bring it to room temperature before using.
Tip for healthy living:
When making cakes like this, reducing the amount of frosting used really helps reduce the sugar content per slice. A little thin layer of frosting between layers won't make that big a difference. Also, while serving slice thinly so that you don't end up eating much nor will there be too much wastage.
Food for thought:
If I am always comparing myself to other human beings, I am either suffering from ego or jealousy.
No comments:
Post a Comment